How to Bluetooth Connect Beats Headphones to Any Device (Step-by-Step Guide)
Introduction
Beats headphones are designed for wireless listening, but connecting them with Bluetooth is not always as smooth as you expect. Sometimes your Beats do not show up in the device list, refuse to pair, or say ‘connected’ but play no sound. These issues can make a simple setup feel far more complicated than it needs to be.
This guide explains exactly how to Bluetooth connect Beats to iPhone, Android, Windows laptops, Mac, smart TVs, consoles, and other devices. You will see how to put different Beats models into pairing mode, how to finish the connection on each platform, and how to reset your headphones when something goes wrong.
You can follow the sections in order if you are setting up your Beats for the first time. If you only need help with a specific device, jump straight to that part and follow the numbered steps. By the end, you will know how to connect Beats quickly and keep your Bluetooth connections stable.
What to Check Before You Bluetooth Connect Your Beats
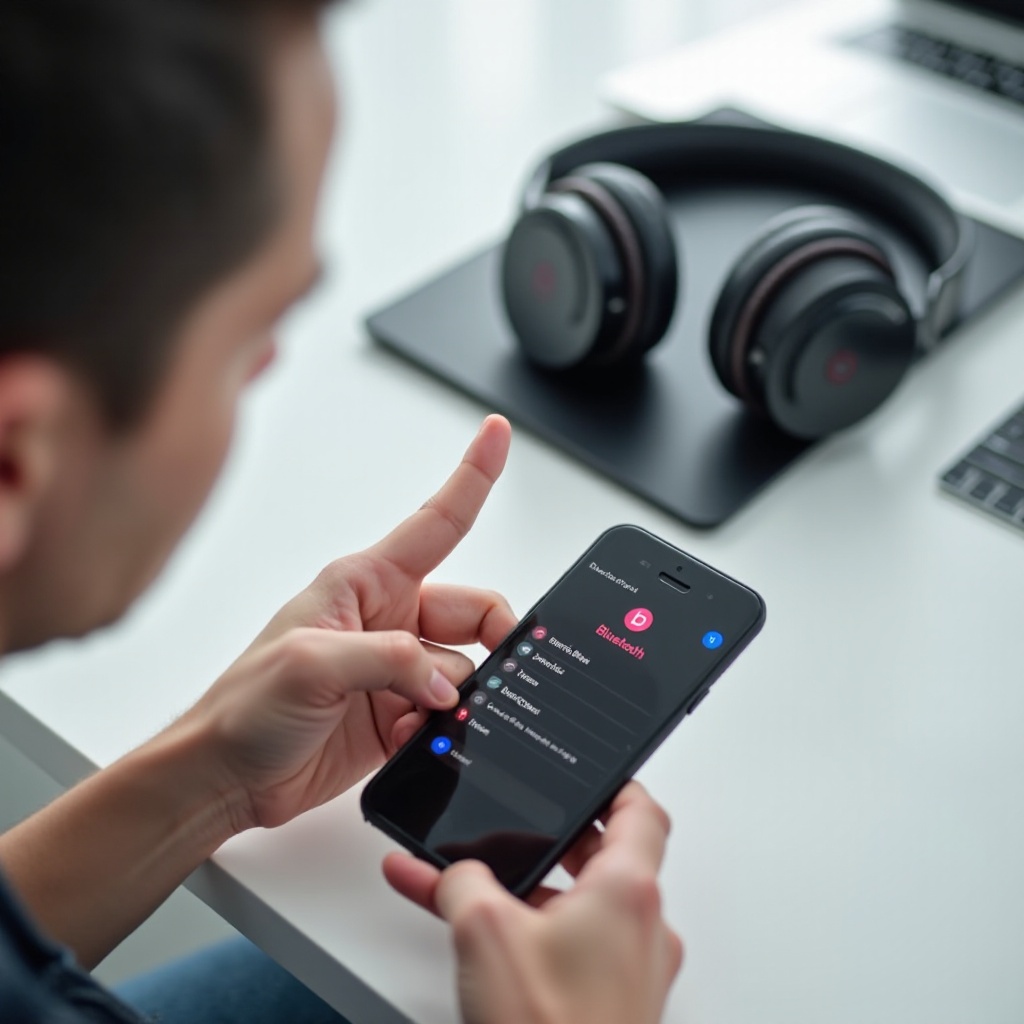
Before you open Bluetooth settings on your phone or computer, take a moment to prepare your Beats and your device. Many connection problems come from low battery, disabled Bluetooth, or outdated software. A short checklist now prevents a lot of frustration later.
Confirm Your Beats Model and Battery Level
Start by confirming which Beats model you own. The name is usually printed on the headband, inside an earcup, or on the charging case for earbuds. Knowing the exact model helps you follow the correct pairing steps, because button layouts and reset methods can differ.
Then check battery level:
- If your Beats have a battery indicator light, make sure it is not solid red or blinking in a low-power pattern.
- For earbuds like Beats Fit Pro or Powerbeats Pro, place them in the case and check that the case itself has enough charge.
A very low battery can stop your Beats from entering pairing mode or can cause them to disconnect as soon as you connect them.
Make Sure Bluetooth Is Enabled on Your Device
Next, confirm that Bluetooth is turned on and ready to scan on your phone, tablet, or computer.
- On phones and tablets, open Settings, find the Bluetooth section, and switch it on.
- On laptops and desktops, open system settings and look for a Bluetooth toggle or menu.
If Bluetooth is off, your Beats will never appear, even if they are in perfect pairing mode. Make this one of the first things you check whenever your Beats do not show up.
Update Your Phone or Computer Software for Best Compatibility
Modern Beats models work best with recent operating systems. Outdated software can cause random dropouts, failed pairing, or poor audio quality.
- On iPhone or iPad, go to Settings → General → Software Update and install any pending update.
- On Android, open Settings, look for System or Software Update, and follow the prompts.
- On Windows or Mac, install available system and driver updates from the official updater.
Once you have a charged pair of Beats, Bluetooth enabled on your device, and reasonably recent software, you are ready for the most important step: putting your Beats into pairing mode.
How to Put Your Beats into Bluetooth Pairing Mode
Every Bluetooth connection starts with pairing mode. This is what makes your Beats discoverable so your phone, tablet, or computer can see them. Different Beats models use slightly different buttons, but the principle is always the same: press and hold a button until the light flashes.
Pairing Mode on Beats Studio and Studio Pro
For Beats Studio and Studio Pro headphones, use these steps:
- Make sure the headphones are turned off.
- Press and hold the power button.
- Keep holding until the LED indicator starts to flash, usually white.
The flashing light means the headphones are now in pairing mode and ready to connect. Keep them close to the device you plan to use, ideally within a couple of feet.
Pairing Mode on Beats Solo and Solo Pro
For Beats Solo and Solo Pro models, the process is very similar:
- Turn the headphones off if they are currently on.
- Press and hold the power button or the ‘b’ button, depending on your model.
- Wait until the LED light starts flashing to show pairing mode.
Some Solo Pro models can also show a pairing animation on nearby Apple devices, but you can always fall back to manual pairing through Bluetooth settings if that does not appear.
Pairing Mode on Beats Fit Pro, Powerbeats Pro, and Other Earbuds
Earbuds like Beats Fit Pro and Powerbeats Pro use their charging case to control pairing:
- Place both earbuds into the charging case and leave the lid open.
- Press and hold the small pairing or system button on the case.
- Hold it until the LED on the case begins to flash.
As long as the light is flashing, your earbuds are in pairing mode and you can start the connection from your phone or computer.
When You Should Reset Your Beats Before Pairing
If the LED does not flash or your Beats remain invisible to every device, a reset can clear locked-up settings and old connections. Keep that option in mind if normal pairing steps fail, because you will use it again in the troubleshooting section.
With pairing mode understood, you are ready to connect to specific devices, starting with iPhone and iPad.
How to Bluetooth Connect Beats to an iPhone or iPad
Apple devices usually offer the smoothest experience with Beats. Many Beats models use Apple-designed chips that support quick pairing, automatic device switching, and improved connection stability.
Turn On Bluetooth and Open iOS Bluetooth Settings
On your iPhone or iPad, start with the Bluetooth settings:
- Open the Settings app.
- Tap ‘Bluetooth’.
- Make sure the Bluetooth switch is turned on.
Stay on this screen while your Beats are in pairing mode. When iOS discovers your headphones, they will appear in the list of available devices.
Use One-Tap Setup with Compatible Beats Models
If you have a recent iPhone or iPad and a newer Beats model such as Beats Studio Pro, Solo Pro, Beats Fit Pro, or Powerbeats Pro, you may see a pop-up card when your Beats are close and in pairing mode:
- Hold your Beats near the unlocked iPhone or iPad.
- Wait for the setup animation to appear.
- Tap ‘Connect’ and follow any on-screen instructions.
If this one-tap setup does not appear, do not worry. Look under ‘Other Devices’ on the Bluetooth settings screen, tap your Beats name, and confirm pairing that way instead.
Switch Your Beats Between Multiple Apple Devices with the Same Apple ID
Once you pair your Beats with one Apple device signed into your Apple ID, they can often switch between your iPhone, iPad, and Mac automatically:
- Start playing audio on a different Apple device that uses the same Apple ID.
- Look for a banner or notification that offers to connect your Beats.
- If needed, open Control Center, tap the audio output icon, and choose your Beats.
If automatic switching feels unreliable, you can always manually select your Beats in Bluetooth or audio settings on the device you want to use.
After you understand pairing on iOS, the next step is connecting your Beats to Android phones and tablets, which follow a similar but more manual process.
How to Bluetooth Connect Beats to an Android Phone or Tablet
Android devices treat Beats like any other Bluetooth headphones. You still get strong wireless audio, and with the Beats app you can access extra features such as firmware updates and more detailed controls for supported models.
Enable Bluetooth and Scan for Your Beats
To connect your Beats to an Android phone or tablet:
- Open the Settings app.
- Tap ‘Connected devices’ or ‘Bluetooth’, depending on your Android version.
- Turn Bluetooth on.
- Tap ‘Pair new device’ or ‘Add device’.
- Make sure your Beats are in pairing mode and nearby.
When you see your Beats in the list of available devices, tap their name and confirm the pairing prompt.
Pair Beats Through the Beats App for Android
The Beats app for Android can give you more control over your headphones and help with updates:
- Install the ‘Beats’ app from the Google Play Store.
- Open the app and accept the requested permissions.
- Put your Beats into pairing mode and keep them near your phone.
- Follow the instructions in the app to connect and finish setup.
Once connected, the app can display battery status and may offer firmware updates that improve Bluetooth performance.
Manage and Switch Between Multiple Paired Devices on Android
If you have paired your Beats with several Android devices, you may need to switch between them:
- On the device you want to use, open Bluetooth settings.
- Find your Beats in the list of paired devices.
- Tap your Beats, then tap ‘Connect’ if needed.
If the headphones stay linked to another phone or tablet, disable Bluetooth on that other device and then connect from your current device. This simple step fixes many ‘refuses to connect’ issues.
With mobile devices covered, the next step is connecting Beats to laptops and desktop computers, starting with Windows.
How to Bluetooth Connect Beats to a Windows Laptop or PC
Windows laptops and PCs work well with Beats as long as Bluetooth is present and the drivers are configured correctly. The pairing process is straightforward if you follow the settings menus carefully.
Check If Your Windows Device Has Bluetooth and Turn It On
First, confirm that your Windows device supports Bluetooth:
- Click the Start menu and select ‘Settings’.
- Go to ‘Devices’ or ‘Bluetooth & devices’, depending on your Windows version.
- Look for a Bluetooth switch.
If you cannot find any Bluetooth options, your computer might need a USB Bluetooth adapter or updated drivers from the manufacturer. If Bluetooth is available, switch it on before you try to add your Beats.
Add Beats as a New Bluetooth Device in Windows Settings
With Bluetooth enabled and your Beats in pairing mode:
- In the ‘Bluetooth & devices’ section, click ‘Add device’.
- Select ‘Bluetooth’ from the list of options.
- Wait while Windows scans for nearby devices.
- Click your Beats when they appear.
- Confirm any prompts to complete pairing.
Windows should then show your Beats as ‘Connected’, which means the link is active and ready to use.
Set Beats as the Default Sound Output and Input
Sometimes Windows connects to your Beats but keeps sending audio to your speakers. To fix this:
- Right-click the speaker icon on the taskbar and choose ‘Sound settings’.
- Under ‘Output’, select your Beats as the default device.
- If your Beats have a microphone and you want to use it for calls, select them under ‘Input’ as well.
After this change, Windows will route system sound and most apps through your Beats by default.
Now that you know how to use Beats with Windows, it is time to connect them to Mac computers, which often share the same Apple ecosystem as your iPhone or iPad.
How to Bluetooth Connect Beats to a MacBook or iMac
MacBooks and iMacs use a process similar to iPhones and iPads, and many Beats features carry over between these Apple devices. Once paired, your Beats can switch between Mac and iOS devices with only a few clicks.
Open Bluetooth in macOS System Settings
On your Mac:
- Click the Apple logo in the top-left corner.
- Select ‘System Settings’ or ‘System Preferences’.
- Click ‘Bluetooth’.
- Turn Bluetooth on if it is off.
Leave this window open. You should see your Beats appear under available devices once they are in pairing mode.
Pair Your Beats and Confirm the Connection
With your Beats in pairing mode and your Mac’s Bluetooth page open:
- Look for your Beats under ‘Nearby Devices’ or a similar section.
- Click the ‘Connect’ button next to the Beats name.
- Approve any prompt that appears to finish the pairing.
After a moment, your Mac should show your Beats as connected, and system audio will usually switch to them automatically.
Quickly Switch Audio Output to Beats from the macOS Menu Bar
When your Mac has several audio devices connected, you can switch back to your Beats without opening full settings:
- Click the Control Center icon or the volume icon in the menu bar.
- Click the audio output section.
- Select your Beats from the list.
This quick access is especially helpful if you swap between external speakers and Beats often.
Once your Beats are working well with phones and computers, you may want to use them with TVs and consoles too. The next section explains how to do that, including what to do if your TV does not have built-in Bluetooth.
How to Use Beats with TVs, Consoles, and Other Devices
Using Beats with a TV or game console can make movies, shows, and games more immersive while keeping the room quiet. The exact steps depend on whether your device supports Bluetooth audio natively or needs a separate adapter.
Connect Beats to Smart TVs with Built-In Bluetooth
Many modern smart TVs include Bluetooth audio support. To connect your Beats:
- Put your Beats into Bluetooth pairing mode.
- Open the TV’s settings menu with the remote.
- Look for ‘Sound’, ‘Audio’, or ‘Bluetooth’ settings.
- Select ‘Add Bluetooth device’ or ‘Pair new device’.
- Choose your Beats from the list that appears.
After pairing, the TV should send its audio through your Beats. Some TVs mute their own speakers automatically when a Bluetooth headset is connected.
Use Bluetooth Adapters for Consoles and Older Devices
Older TVs and many game consoles do not support standard Bluetooth audio for headphones. You can still use Beats by adding a Bluetooth audio transmitter:
- Purchase a small Bluetooth transmitter that plugs into the headphone jack, USB port, or optical output of your TV or console.
- Put both the transmitter and your Beats into pairing mode, following the transmitter’s instructions.
- Wait for the transmitter and Beats to connect to each other.
Once paired, the transmitter sends the device’s audio to your Beats wirelessly, even if the original device has no native Bluetooth audio support.
Audio Delay Considerations When Watching Movies or Gaming
Bluetooth audio can introduce a small delay between what you see and what you hear. For casual viewing this may not matter, but for fast-paced games or sensitive viewers it can be noticeable.
To reduce audio delay:
- Use a low-latency Bluetooth transmitter if your TV or console needs an adapter.
- Keep your Beats close to the TV or console to strengthen the signal.
- Reduce wireless interference by moving away from busy routers or other sources of radio noise.
If the delay still bothers you, a wired connection or a specialized low-latency wireless system may offer a better experience for gaming.
If you reach this point and still have connection problems with any device, the next section will help you troubleshoot common Bluetooth issues with Beats.
Troubleshooting: Beats Not Connecting via Bluetooth
Even when you follow every step carefully, Bluetooth can misbehave. The good news is that most issues fall into a few simple categories: your Beats do not appear, they connect with no sound, or the sound keeps dropping. Each problem has practical fixes you can try in minutes.
Beats Not Showing Up in the Bluetooth Device List
If your Beats never appear when you scan for devices:
- Confirm your Beats are in pairing mode and the LED is flashing.
- Turn Bluetooth off and back on again on your phone, tablet, or computer.
- Move your Beats closer to the device and remove obstacles like walls or metal objects.
- Restart your phone or computer to clear any temporary glitches.
If you have previously paired your Beats with several devices, they might be trying to reconnect to one of those automatically. Turn Bluetooth off on those other devices and then try scanning again from your current device.
Beats Connected but There Is No Sound
If your device shows your Beats as ‘Connected’ but you hear nothing:
- Raise the volume on both your Beats and your device.
- Check that your Beats are selected as the active audio output in Bluetooth or sound settings.
- Try playing audio from a different app or file to rule out app-specific issues.
- On computers, open sound settings and make sure the output device is set to your Beats.
Some communication apps, such as video conferencing tools, have their own audio settings. Make sure those apps also point to your Beats as the microphone and speaker if you use them for calls.
Frequent Bluetooth Dropouts or Distorted Audio
If your Beats keep dropping the connection or the audio sounds choppy:
- Stay within a short distance of your device, ideally in the same room.
- Avoid thick walls, large metal objects, and crowded wireless environments.
- Close apps that heavily load the processor or use a lot of network bandwidth.
- Check for and install firmware, app, and operating system updates.
If dropouts happen only in certain locations, wireless interference in that area is likely the cause.
Reset Your Beats and Clear Bluetooth Settings on Your Device
If none of the above fixes the problem, a full reset often restores normal behavior. Exact steps vary by model, but the general pattern for many Beats headphones is:
- Turn your Beats on.
- Press and hold a specific button combination (often the power button plus volume down) for several seconds until the LED flashes or changes color.
- Release the buttons and wait for the headphones to restart.
Then clear the old Bluetooth profile from your device:
- Open Bluetooth settings on your phone or computer.
- Find your Beats in the paired or remembered devices list.
- Select your Beats and choose ‘Forget’, ‘Remove’, or ‘Unpair’.
- Restart your phone or computer.
- Put your Beats in pairing mode again and reconnect as if they were new.
A clean reset on both sides removes corrupt profiles and stale data that often cause stubborn pairing and connection issues.
With the main technical hurdles out of the way, you can focus on keeping your Bluetooth connection smooth and your Beats battery healthy. The final section will share practical tips for performance and battery life.
Tips to Improve Bluetooth Performance and Battery Life on Beats
A solid initial setup is important, but day-to-day habits also affect how well your Beats perform. Small changes in how you use, charge, and store your headphones can improve connection quality and extend battery life.
Stay Within Optimal Bluetooth Range and Avoid Interference
Bluetooth works best at short distances with few obstacles. To keep the signal strong:
- Try to stay within about 10 meters (30 feet) of your device.
- Avoid placing your phone in a bag or behind thick walls while listening.
- Keep your Beats away from strong sources of interference, such as Wi-Fi routers and microwave ovens, when possible.
A clear path between your Beats and the source device reduces dropouts, static, and other connection issues.
Keep Firmware, Apps, and Operating Systems Up to Date
Updates are not just for new features. They also fix bugs and improve Bluetooth stability:
- On Apple devices, Beats firmware updates often install automatically when the headphones are connected.
- On Android, the Beats app may notify you about firmware updates and walk you through the process.
- On computers, regular system and Bluetooth driver updates can resolve random disconnections.
Make it a habit to allow updates and to check for them from time to time. Stable software means fewer surprises when you connect.
Charge and Store Your Beats Correctly for Longer Battery Health
Battery care affects both how long your Beats last per charge and how many years they stay useful:
- Avoid letting your Beats run to 0% every time. Try to recharge when they reach a low level instead.
- Use quality chargers and the cable that came with your Beats or a reliable replacement.
- Store your headphones or earbuds in their case or a protective pouch when not in use.
- Keep them away from extreme heat, cold, and moisture.
Healthy batteries support more stable Bluetooth performance, charge more predictably, and help you avoid sudden shutdowns in the middle of calls or songs.
Conclusion
Learning how to Bluetooth connect Beats does not have to be confusing. The key steps are simple: charge your Beats, enable Bluetooth on your device, put the headphones into pairing mode, and then complete the connection from your device’s settings. Once you master those basics, connecting to iPhone, Android, Windows, Mac, TVs, and consoles becomes routine.
When problems appear, you now know how to respond. You can check range and interference, confirm your Beats are selected as the active audio output, install updates, or perform a clean reset on both the headphones and the device. These actions fix most pairing failures, ‘connected but no sound’ issues, and random dropouts.
With this guide as a reference, you can set up every new device with confidence, switch between them easily, and enjoy clear wireless audio from your Beats headphones or earbuds without fighting Bluetooth menus every time.
Frequently Asked Questions
Why won’t my Beats go into Bluetooth pairing mode?
If your Beats will not enter Bluetooth pairing mode, charge them for at least 15–20 minutes and then try again. Use the correct button sequence for your model and keep holding the buttons until the LED starts flashing. If the light never changes, perform a full reset following the model-specific instructions, then repeat the pairing steps with your phone or computer nearby.
Can I connect my Beats to more than one device at the same time?
You can pair your Beats with several different devices, such as a phone, tablet, laptop, and TV, but most models only maintain an active connection with one device at a time. To switch, open Bluetooth settings on the device you want to use and select your Beats there. If they stay connected to another device, turn Bluetooth off on that other device and connect again from your current one.
How do I reset my Beats if Bluetooth still doesn’t work after troubleshooting?
If Bluetooth still fails after basic fixes, reset your Beats and clear the old pairing on your device. For many models, turn the Beats on and hold a specific button combination, often the power and volume-down buttons, until the LED flashes or changes color. Then remove your Beats from the Bluetooth list on your phone or computer, restart the device, put the Beats back into pairing mode, and pair them again as if they were new.