How to Connect a Samsung TV to Sonos: Complete Setup and Troubleshooting Guide
Introduction
Connecting a Samsung TV to Sonos is one of the most effective ways to upgrade your home entertainment system without adding a complex AV receiver or multiple boxes. Samsung delivers sharp, vivid picture quality, while Sonos focuses on clear dialogue, rich sound, and easy multiroom audio. When you link them correctly, the experience feels unified: one remote, one app, and a big step up in sound.
Many people, however, hit the same problems when they first try to connect Samsung TV to Sonos: no sound from the soundbar, audio delay during games, or Dolby Atmos not showing up even though the TV and Sonos product claim to support it. In most cases, these issues come down to using the wrong port, the wrong cable, or an audio setting that does not match your setup.
This guide walks you through the full process from start to finish. You will learn how to check your Samsung TV ports, how to connect different Sonos products, which audio formats to choose, and how to fix common issues like lip-sync problems, missing surround sound, or volume control not working. Each section connects to the next so you can follow along in order, or jump to the part that fits your current setup.
By the end, you will know exactly how to connect Samsung TV to Sonos, how to tune everything for the best sound, and how to keep your system running smoothly day after day.

What You Need Before Connecting Your Samsung TV to Sonos
Before you plug in any cables, it helps to confirm what your Samsung TV supports and which Sonos products you own. The ports on your TV and the model of Sonos device determine how you should connect them and what audio formats you can expect.
Compatible Samsung TV models and audio ports (ARC, eARC, Optical)
Most recent Samsung TVs include at least one HDMI port that supports audio return and an optical digital audio output. Look at the back or side of your TV, or open the on-screen manual, and identify the following ports:
- HDMI ARC: Usually labeled ‘HDMI ARC’. This port sends audio from the TV to a connected soundbar or receiver and also allows basic control through HDMI-CEC.
- HDMI eARC: Often labeled ‘HDMI eARC’. This is an enhanced version of ARC that supports higher-bandwidth audio, such as Dolby Atmos over Dolby Digital Plus.
- Optical (Digital Audio Out): A small square port with a protective flap. This sends digital audio over an optical cable, usually as stereo PCM or Dolby Digital 5.1.
If your Samsung TV has HDMI eARC, that is the best option for use with Sonos Arc or Beam (Gen 2), especially if you want Dolby Atmos. HDMI ARC works very well for most setups that need Dolby Digital 5.1. Optical still provides a big improvement over TV speakers, especially when paired with Sonos Ray or older TVs.
Compatible Sonos devices for TV audio (Arc, Beam, Ray, Amp, Era, One, Sub)
Not every Sonos product connects to a TV in the same way, but many can be part of a home theater system. It is important to know which role each device plays.
- Direct TV connection (connects with HDMI or optical):
- Sonos Arc (HDMI eARC/ARC)
- Sonos Beam (Gen 1 and Gen 2) – HDMI ARC, with optional optical adapter
- Sonos Ray – optical only
- Sonos Amp – HDMI ARC or optical with adapter, for passive speakers
- Used as surrounds or extra speakers (wireless, no direct TV connection):
- Sonos Era 100, Era 300
- Sonos One, One SL
- Sonos Five
- Bass modules (wireless, paired in the app):
- Sonos Sub
- Sonos Sub Mini
If you own Sonos Arc or Beam and a Samsung TV with ARC or eARC, you can build a very capable home theater system. Sonos Ray is ideal when you rely on an optical connection. Sonos Amp is the right choice if you want to power your own passive speakers and still keep everything in the Sonos ecosystem.
Cables, adapters, and network requirements
Along with your TV and Sonos devices, you need the right cables and a stable network:
- HDMI cable:
- Use at least a high-speed HDMI cable for ARC or eARC connections.
- A certified Ultra High Speed HDMI cable is a safe choice if you also use 4K HDR and high frame rate sources.
- Optical cable:
- Required for Sonos Ray or for using the HDMI-to-optical adapter with Arc or Beam on older TVs.
- HDMI-to-optical adapter:
- Sonos includes an adapter with Arc and Beam. It lets you connect an optical output from the TV to the soundbar.
- Network:
- A stable 2.4 GHz or 5 GHz Wi-Fi network is essential for Sonos.
- You can connect at least one Sonos device via Ethernet to increase reliability in busy networks.
With ports, devices, and accessories checked, you can now decide which connection method will give you the best balance of simplicity and audio quality.
Best Ways to Connect Samsung TV to Sonos
The best way to connect Samsung TV to Sonos depends on the ports you have and the Sonos product you use. HDMI eARC offers the greatest flexibility and audio quality, HDMI ARC is a strong second choice, and optical remains a reliable option when HDMI is limited. For some systems, an audio extractor can also help bridge gaps.
When to use HDMI ARC with Sonos soundbars
Use HDMI ARC when:
- Your Samsung TV has a port labeled ‘HDMI ARC’.
- Your Sonos device is Arc, Beam, or Amp.
Key benefits:
- One cable handles both audio and some control functions.
- You can adjust Sonos volume with the Samsung TV remote using HDMI-CEC (Anynet+).
- You can receive Dolby Digital 5.1 audio from supported content.
To set this up, plug one end of the HDMI cable into the TV’s HDMI ARC port and the other end into the HDMI port on your Sonos soundbar or Amp. Then enable Anynet+ in the Samsung settings so the TV can control the soundbar.
When to use HDMI eARC for Dolby Atmos and 5.1 audio
Use HDMI eARC when:
- Your Samsung TV has a port labeled ‘HDMI eARC’.
- You own Sonos Arc or Beam (Gen 2) and want Dolby Atmos when available.
Advantages of eARC include:
- Support for higher-bandwidth audio formats compared to standard ARC.
- More consistent Dolby Atmos from streaming apps that use Dolby Digital Plus.
- Better handling of multi-channel audio with less chance of dropouts or down-mixing.
If Atmos and immersive sound matter to you, connecting Samsung TV to Sonos through HDMI eARC is the ideal method. Use a high-quality HDMI cable, enable eARC in the TV settings, and make sure Dolby Atmos is turned on where available.
When to use Optical connection and its limitations
Optical is still a strong option and is often the only digital audio path on certain TVs.
Use optical when:
- Your TV does not offer HDMI ARC or eARC.
- You use Sonos Ray, or you rely on the HDMI-to-optical adapter included with Arc or Beam.
Benefits:
- Simple and robust digital connection.
- Compatible with many older Samsung TVs and displays.
Limitations:
- No Dolby Atmos over optical.
- Audio is usually limited to Dolby Digital 5.1 or stereo PCM.
- No HDMI-CEC; you may need to teach Sonos the IR commands from your TV remote.
If you mainly watch broadcast TV, streaming series, and movies in standard surround sound or stereo, an optical connection still delivers a clear upgrade from TV speakers.
Using audio extractors or switches if your TV lacks ARC/eARC
Some setups involve older or limited Samsung TVs that do not support ARC or eARC at all, or that struggle to pass through surround sound correctly. In that case, an HDMI audio extractor or eARC adapter can bridge the gap.
Typical use case:
- Connect your streaming box, Blu-ray player, or console to the HDMI input on the extractor or switch.
- Connect the extractor’s HDMI output to the Samsung TV for video.
- Connect the extractor’s HDMI ARC/eARC or optical output to your Sonos soundbar.
This method adds another device but can unlock Dolby Digital or even Atmos in certain scenarios, especially when the TV itself cannot pass these formats reliably. It is most useful for enthusiasts who need specific formats and do not mind the extra hardware.
After choosing the best connection method, you are ready to follow a practical, step-by-step setup process.
Step-by-Step: Connect Samsung TV to a Sonos Soundbar (Arc, Beam, Ray)
With the connection type decided, the next step is to physically connect the devices, configure your TV’s sound settings, and complete setup in the Sonos app. The process remains similar for Arc, Beam, and Ray, with only minor differences between HDMI and optical.
Physical setup: HDMI or Optical connection to Sonos
Follow these steps to connect the hardware:
- Position the soundbar:
- Place the Sonos soundbar centered under your Samsung TV.
- Allow some space around it so the speakers can project sound freely.
- For HDMI ARC/eARC (Arc, Beam, Amp):
- Find the TV’s HDMI ARC or eARC port.
- Connect one end of the HDMI cable to that port.
- Connect the other end to the HDMI port on your Sonos soundbar or Amp.
- For optical (Ray or Arc/Beam with adapter):
- Connect one end of the optical cable to the TV’s ‘Digital Audio Out (Optical)’ port.
- Connect the other end to the optical port on Sonos Ray.
- Or, connect the optical cable to the Sonos HDMI-to-optical adapter, then plug the adapter into Arc or Beam.
- Power on the Sonos device:
- Plug the power cable into the soundbar and then into a wall outlet.
- Wait for the status light to show that it is ready to set up.
Once the physical connection is in place, you can adjust your Samsung TV settings so the audio flows correctly to Sonos.
Configuring Samsung TV sound settings for Sonos
On your Samsung TV, adjust the sound settings to send audio to the soundbar:
- Open Settings from the home screen.
- Go to Sound.
- Select Sound Output:
- Choose ‘Receiver (HDMI)’ or ‘Receiver (HDMI eARC)’ if using HDMI.
- Choose ‘Optical’ or ‘Digital Audio Out’ if using an optical cable.
- Enable Anynet+ (HDMI-CEC) for HDMI setups:
- Go to Settings → General → External Device Manager → Anynet+ (HDMI-CEC).
- Set it to ‘On’.
- Open Expert Settings under Sound and set Digital Output Audio Format to Bitstream if you want surround sound, or PCM if you need a basic, stable stereo signal.
These settings tell the TV to route audio through the HDMI or optical connection instead of the built-in speakers and prepare the signal for Sonos.
Setting up the Sonos soundbar in the Sonos app
Next, complete the setup in the Sonos app so your soundbar joins your system and connects to Wi-Fi.
- Install the Sonos app on your phone or tablet and sign in or create an account.
- Make sure your phone is on the same Wi-Fi network you plan to use with Sonos.
- Open the app and tap ‘Add Product’ when prompted, or go to Settings → System → Add Product.
- Follow the on-screen instructions to detect the soundbar, connect it to Wi-Fi, and link it to your Sonos account.
- Choose a room name such as ‘Living Room TV’ so it is easy to identify.
- If your device supports Trueplay and you use an iOS device, run Trueplay tuning to optimize the sound for your room.
After setup, the Sonos app can show you whether it is receiving TV audio, what format it is getting, and whether the device is part of a home theater group.
Testing TV audio, volume control, and input switching
Now test the link between Samsung TV and Sonos:
- Play a show or movie from a streaming app on the TV or from an HDMI device.
- Check that audio comes out of the Sonos soundbar instead of the TV speakers.
- Use the Samsung TV remote to adjust the volume.
- If volume does not change, review ARC/eARC, Anynet+, or IR setup in the Sonos app.
- Switch between a few different inputs or apps and confirm that the soundbar keeps playing the audio from each source.
Once your main TV and soundbar are working, you can expand the system with surrounds and a Sub for a more immersive home theater experience.
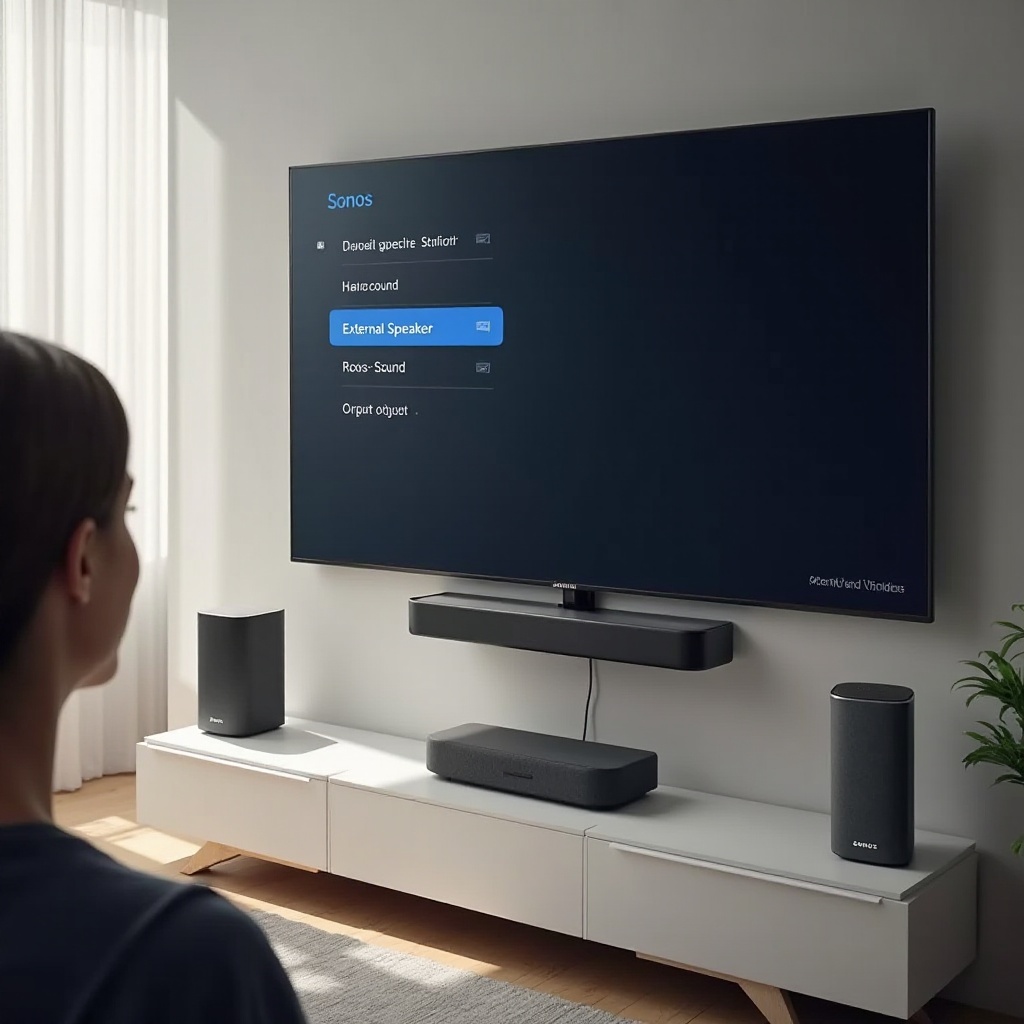
Using Sonos Speakers and Sub with Your Samsung TV
A single Sonos soundbar already improves clarity and volume, but adding wireless surrounds and a subwoofer can turn your Samsung TV into a far more cinematic setup. This section explains how to build that fuller Sonos home theater experience around your TV.
Adding wireless surrounds to create a Sonos home theater
Sonos lets you add two matching speakers as wireless surrounds to your soundbar:
- Place one surround speaker on the left and one on the right behind or beside your main seating area.
- Open the Sonos app and go to Settings → System.
- Select your TV room (for example, ‘Living Room TV’).
- Tap ‘Add Surrounds’ and follow the prompts.
- Select the two speakers you want to use as surrounds (for example, two Era 100 or two One SL).
Once set, the soundbar handles front channels, while the surrounds play rear effects for movies and shows. For music, you can choose in the app whether the surrounds play a full stereo mix or only ambient audio.
Adding Sonos Sub or Sub Mini for deeper bass
Adding a Sub or Sub Mini gives your system much stronger low-end impact:
- Place the Sub on the floor near a wall, not inside a tight cabinet, for more consistent bass.
- In the Sonos app, open Settings → System and select your TV room.
- Tap ‘Add Sub’ and follow the steps to pair the Sub or Sub Mini with your soundbar.
- Once paired, the soundbar and surrounds focus on mids and highs while the Sub handles deep bass.
The combination of soundbar, surrounds, and Sub can drastically improve movie soundtracks and live sports, especially in medium to large rooms.
Grouping multiple Sonos rooms to play Samsung TV audio
If you want to hear TV audio in other rooms, you can group your TV room with other Sonos rooms:
- Start playing content on your Samsung TV so Sonos receives the TV signal.
- Open the Sonos app and find the room connected to your TV.
- Tap ‘Group’ and pick the other rooms or speakers you want to include.
Grouped rooms will play the same TV audio, which is useful for parties or following a game while you move around the house. Keep in mind there may be slight audio delay between rooms compared with the TV picture, so keep your main viewing area as the focus.
With the hardware and room layout defined, the next step is to fine-tune the audio settings on your Samsung TV and Sonos system for the best possible sound.

Optimizing Samsung TV Settings for the Best Sonos Sound
Even when everything is connected properly, audio formats and sound modes have a big impact on clarity, surround effect, and stability. Tweaking a few settings can unlock better quality and avoid issues like missing surround sound or unstable audio.
Choosing the correct audio output format (PCM vs Bitstream)
On most Samsung TVs, you can choose how the TV sends audio to external devices. Go to Settings → Sound → Expert Settings and look for Digital Output Audio Format.
- PCM:
- Sends a stereo signal.
- Works well when you have a simple 2.0 or 2.1 setup.
- Can help if you experience audio dropouts or compatibility problems with Bitstream.
- Bitstream:
- Sends encoded formats such as Dolby Digital 5.1 or Dolby Digital Plus.
- Preferred when using Sonos Arc, Beam, or a setup with surrounds and Sub.
For most Sonos home theater setups, Bitstream is the better choice, because it lets the soundbar decode surround sound properly. If you run into glitches, try switching temporarily to PCM and see if it resolves the issue.
Enabling Dolby Digital, Dolby Digital Plus, and Dolby Atmos
If your Samsung TV supports Dolby Digital Plus and Dolby Atmos, you can enable them for compatible apps and sources.
Follow these steps:
- In Expert Settings under Sound, set Digital Output Audio Format to Bitstream.
- Set Dolby Atmos to ‘On’ if the option is available.
- Make sure any connected streaming devices, such as Apple TV or game consoles, are also set to output Dolby Digital or Dolby Digital Plus with Atmos where supported.
Sonos Arc and Beam (Gen 2) can then receive Atmos signals through HDMI ARC or eARC when the app and source provide them. In the Sonos app, you can check the ‘Now Playing’ screen to see whether you are getting stereo, Dolby Digital 5.1, or Dolby Atmos.
Adjusting sound modes, dialog enhancement, and night mode
To avoid conflicts between the TV and Sonos, keep Samsung’s processing simple and use Sonos features for fine-tuning.
On the Samsung TV:
- Avoid using heavy virtual surround modes when you already use a Sonos soundbar.
- Stick with a neutral sound mode, especially when the soundbar handles most audio processing.
On Sonos:
- Speech Enhancement: Boosts mid-range frequencies to make dialogue easier to hear. Toggle this in the Sonos app while TV audio is playing.
- Night Sound: Compresses the dynamic range to soften loud effects and raise quiet sounds. Ideal for late-night viewing when you do not want to disturb others.
Once your audio formats and sound modes are optimized, your system should sound clear and immersive. Still, minor issues can appear over time, so it is helpful to know how to troubleshoot the most common ones.
Common Samsung TV to Sonos Problems and How to Fix Them
Even with a good setup, users sometimes see problems like silence from the soundbar, out-of-sync audio, or missing surround sound. Fortunately, most of these issues have straightforward fixes that you can apply yourself.
No sound from Sonos when Samsung TV is on
If you see a picture but hear no sound from Sonos, check the following:
- Open Sound Output on the Samsung TV and confirm it is set to ‘Receiver (HDMI)’ or ‘Optical’, not ‘TV Speaker’.
- Check that the HDMI or optical cable is fully inserted into both the TV and Sonos device.
- Ensure Anynet+ (HDMI-CEC) is enabled for HDMI setups.
- Power cycle the TV and Sonos:
- Turn both off and unplug them from power for about 30 seconds.
- Plug them back in and turn them on.
- Open the Sonos app and check whether the soundbar shows ‘TV’ as the current source when you play something on the TV.
If the TV keeps switching back to internal speakers, reselect the correct audio output and check for any available firmware updates on the TV and Sonos devices.
Audio delay or lip-sync issues with streaming apps or consoles
Lip-sync problems can happen when video and audio are processed differently. To correct them:
- On the Samsung TV, go to Sound → Expert Settings and look for Digital Output Audio Delay or a similar option, then adjust it until lips and voices match.
- In the Sonos app, go to Settings → System → your TV room, and adjust TV Dialog Sync until the delay is minimized.
- For gaming, enable Game Mode on the TV to reduce video processing and latency.
- If issues continue, try switching between PCM and Bitstream output on the TV to see which format produces better sync.
With these adjustments, you can usually bring sound and picture back into alignment.
Atmos or surround sound not working on Sonos
If you expect Dolby Atmos or 5.1 surround but only get stereo, go through this list:
- Confirm that your Samsung TV and Sonos product both support Atmos (for example, Sonos Arc or Beam Gen 2 with a TV that supports Atmos over ARC or eARC).
- Make sure the soundbar is connected to the TV’s eARC or ARC port, not a standard HDMI port.
- Use a high-speed HDMI cable to avoid bandwidth issues.
- Set Digital Output Audio Format to Bitstream and enable Dolby Atmos in the TV’s Expert Settings.
- Check the streaming app or source device settings and ensure they are set to output Dolby Digital Plus or Atmos when available.
Remember that optical connections cannot pass Atmos and may also limit surround sound options. In that case, you will be restricted to Dolby Digital 5.1 or stereo.
Volume control not working with the Samsung remote
When the TV remote does not change the Sonos volume, you can usually fix it by adjusting CEC or teaching the remote to Sonos.
- Confirm your HDMI cable is connected to the TV’s ARC/eARC port and that Anynet+ (HDMI-CEC) is enabled.
- If volume control through HDMI-CEC is unreliable, open the Sonos app and go to Settings → System → your TV room.
- Select Remote Control Setup and follow the steps to have Sonos learn the IR commands from your Samsung remote.
After this, the same volume buttons will control Sonos even if CEC fails or if you use an optical connection.
With most common issues resolved, you can shift your focus from troubleshooting to enjoying your setup during everyday use.
Daily Use Tips for Samsung TV and Sonos
A well-configured system should feel simple to use for everyone in your home. Smooth volume control, easy switching between TV and music, and convenient voice or app control all contribute to a better daily experience.
Controlling Sonos volume with the Samsung remote
Once your HDMI ARC or eARC connection and Anynet+ are set correctly, you can use the Samsung TV remote normally:
- Press the volume up or down buttons on the TV remote.
- The on-screen volume display will show a receiver or soundbar indicator instead of TV speaker volume.
- The Sonos soundbar responds directly to those volume commands.
If you use an optical connection, IR remote setup in the Sonos app allows the same volume buttons to control the soundbar. This keeps interaction simple: turn on the TV, choose what to watch, and use one remote for volume.
Switching between TV sound and music streaming on Sonos
One advantage of Sonos is that your TV room can double as a music speaker.
- When the TV is on and playing audio, your Sonos soundbar uses the TV input.
- When you start music from the Sonos app, the soundbar switches to that music source.
- When you go back to watching TV, the soundbar returns to TV audio automatically.
Use the Sonos app to:
- Browse and play music from services such as Spotify, Apple Music, Amazon Music, and more.
- Group the TV room with other Sonos rooms for whole-home audio when you do not need perfect lip-sync.
Using voice assistants and mobile casting with your TV and Sonos
Many Sonos devices support voice assistants and casting, which adds further convenience.
- If your Sonos speaker supports it, enable Alexa, Google Assistant, or Sonos Voice Control to adjust volume, play music, or pause playback with voice commands.
- Use AirPlay 2 on Apple devices to send audio directly to compatible Sonos speakers or groups.
- Cast from apps such as Spotify by choosing your Sonos room as the output device.
With these features, family members and guests can easily interact with the system using their phones or voice, without learning detailed audio settings.
Conclusion
Connecting a Samsung TV to Sonos does not need to be complicated. Once you know which ports your TV offers and which Sonos devices you own, you can match them with the right connection method: HDMI eARC for the best Atmos and surround support, HDMI ARC for reliable Dolby Digital 5.1, or optical for a clean upgrade over built-in TV speakers.
By checking compatibility first, following a clear step-by-step setup, and tuning Samsung’s sound options to match Sonos, you can avoid most common problems. When issues do appear, simple adjustments like changing audio format, toggling Game Mode, or reconfiguring volume control usually solve them quickly.
After everything is dialed in, your Samsung TV and Sonos system will feel like a single, cohesive home theater: sharp picture, clear dialogue, powerful sound, and easy control through one remote and the Sonos app. From movies and sports to music streaming across multiple rooms, the combination delivers a flexible and enjoyable experience for everyday use.
Frequently Asked Questions
Can I connect my Samsung TV to Sonos wirelessly without HDMI or Optical?
You cannot reliably send TV audio wirelessly from a Samsung TV straight to Sonos. Sonos soundbars do not accept Bluetooth or Wi-Fi audio input from the TV. Samsung’s wireless audio options are designed for Samsung-branded soundbars, not Sonos. To get TV sound into Sonos, you need a physical audio connection, such as HDMI ARC, HDMI eARC, or optical, going from the Samsung TV to a Sonos soundbar or Amp. Once the Sonos device receives the TV audio, you can wirelessly group that room with other Sonos speakers around your home for multiroom listening.
Why is there a delay when I use my Samsung TV with Sonos, and how can I fix it?
Audio delay or lip-sync problems usually appear when the TV and soundbar process video and audio at different speeds, or when content passes through extra devices such as streaming boxes or consoles. To fix it, start on the Samsung TV by adjusting Digital Output Audio Delay or similar options in the Sound Expert Settings. Then, in the Sonos app, go to Settings, System, and your TV room to adjust TV Dialog Sync. For gaming, enable Game Mode on the TV to reduce video processing. You can also test both PCM and Bitstream output on the TV; one format may sync better in your specific setup.
Do I need a specific Samsung TV with eARC to get Dolby Atmos on my Sonos Arc or Beam?
A Samsung TV with HDMI eARC is the most reliable way to get Dolby Atmos on Sonos Arc or Beam (Gen 2), but it is not the only path. Some Samsung TVs with standard ARC can still pass Atmos in a compressed format via Dolby Digital Plus, depending on the model and the streaming app. However, support is less consistent and may be limited by the TV’s firmware. If Atmos is important to you, choose a Samsung TV with HDMI eARC, connect it directly to the Sonos soundbar with a high-speed HDMI cable, set Digital Output Audio Format to Bitstream, and enable Dolby Atmos in the TV’s sound settings to maximize your chances of getting a stable Atmos signal.