My Ring Camera Won’t Connect to Wi-Fi: Step-by-Step Fixes for a Stable Smart Home Connection
Introduction
Few things are more frustrating than opening the Ring app, tapping Live View, and getting an error instead of a clear video feed. When you rely on Ring cameras to watch your front door, driveway, or backyard, connection problems feel urgent and stressful. If you keep saying ‘my ring camera won’t connect to WiFi’, you are not alone, and the good news is that most issues have clear, practical fixes.
This guide walks you through a simple but thorough process to get your Ring camera back online and keep it stable. You will learn how Ring devices connect to your Wi-Fi, how to check basic settings, and how to tune your router so your smart home stays reliable. We will start with quick checks, then move to signal strength, router configuration, device resets, and advanced diagnostics. By the end, you should understand what went wrong and how to prevent repeat problems.
Before we dive into fixes, it helps to know how Ring cameras actually talk to your network and why that connection can break.
How Ring Cameras Connect to Wi-Fi in a Modern Smart Home
Your Ring camera is a small, always-on Wi-Fi device that needs a steady link between your home network, the Ring cloud, and your phone. When that chain breaks at any point, you see offline warnings, failed Live View, or delayed motion alerts.
Most Ring cameras use:
- 2.4 GHz Wi-Fi for longer range and better wall penetration
- Your home router as the bridge to the internet
- The Ring app on your phone or tablet to control setup and viewing
Many newer routers use a single network name for both 2.4 GHz and 5 GHz bands. This ‘combined’ network can cause issues if the router tries to push your Ring device toward 5 GHz, while the camera really needs a stable 2.4 GHz connection. That is a common reason people say ‘my ring camera won’t connect to WiFi’ even when laptops and phones work fine.
Your camera also depends on:
- Stable power from a battery or wired supply
- A clear enough path for Wi-Fi signals through walls, doors, and windows
- Router security and encryption that the Ring device can understand
With that basic picture in mind, you are ready to run some quick checks. These fast tests help you decide whether you are dealing with a local camera problem or a wider network or service issue.
Quick Checks Before Deep Troubleshooting
Before you change settings or reset anything, confirm that the problem really sits with the camera or its Wi-Fi link. These simple checks often save a lot of time and frustration.
- Check the internet on another device
- Connect your phone or laptop to the same Wi-Fi network.
- Try browsing a few websites and streaming a short video.
-
If pages load slowly or not at all, the issue may be with your internet connection or router, not just the Ring camera.
-
Verify Ring service status
- Open the Ring app and see whether other devices in your account work.
- If everything shows errors, check Ring’s official status page.
-
If there is an outage, you will have to wait until Ring restores service.
-
Confirm that the Ring app is up to date
- Open your phone’s app store.
- Search for the Ring app and update it if a new version is available.
-
An outdated app can cause setup failures, login issues, or connection glitches.
-
Restart your phone and router
- Turn your phone off, wait a few seconds, then turn it back on.
- Unplug your router and modem for about 30 seconds.
- Plug them back in and wait a few minutes for them to fully restart.
If your Ring camera still will not connect after these basic checks, the next logical step is to look closely at the Wi-Fi network and password you use. Even small mistakes there can stop the camera from joining your network.
Confirm Your Wi-Fi Network and Password
Many Ring connectivity issues come from very simple network or password problems. Your camera must connect to the exact network name and password you enter in the Ring app. A tiny mismatch can block the connection.
Use this checklist:
- Confirm the correct Wi-Fi network (SSID)
- On your phone, open Wi-Fi settings.
- Note the exact network name, including spelling and capitalization.
-
Make sure you are not on a guest network that isolates devices, because that can prevent the camera from reaching the internet or your phone.
-
Check the band: 2.4 GHz vs 5 GHz
- Most Ring cameras work best on 2.4 GHz.
- If your router has separate names such as ‘HomeWiFi_2G’ and ‘HomeWiFi_5G’, choose the 2.4 GHz option during setup.
-
If you only see one network name, your router may use both bands under that single name. That can work, but if you have issues, splitting the bands in your router settings often helps.
-
Re-enter your Wi-Fi password carefully
- Type the password slowly and double-check every character.
- Remember that passwords are case-sensitive.
-
Watch out for confusing characters such as ‘O’ and ‘0’, or ‘l’ and ‘1’.
-
Avoid tricky special characters in test passwords
- Some routers allow very complex passwords with many symbols.
- Certain smart home devices do not handle all special characters well.
- If connection keeps failing, test with a simpler but still strong password, then decide whether to keep it.
If your camera still cannot join your Wi-Fi after you confirm the network and password, the issue may be signal strength rather than credentials. That means you should focus on how strong the Wi-Fi signal is where your camera sits.
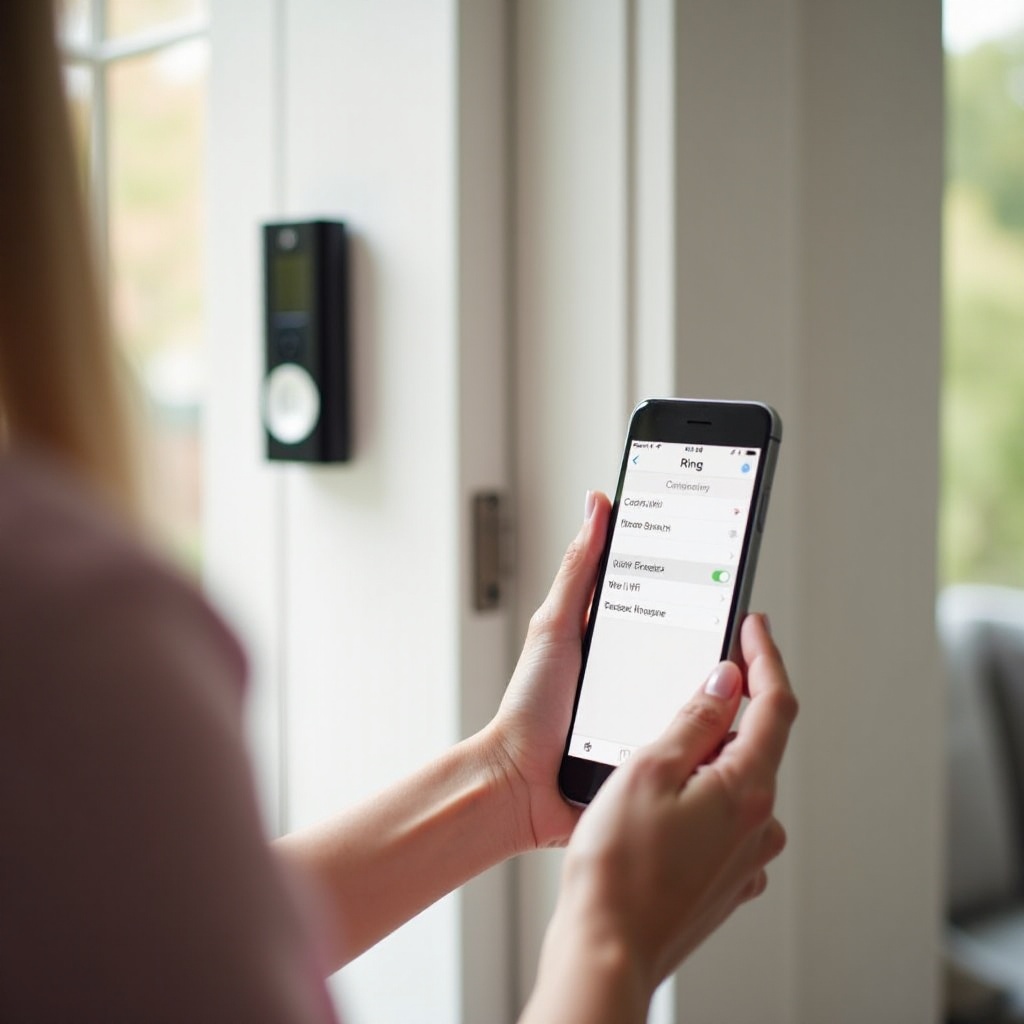
Fix Weak Wi-Fi Signal to Your Ring Camera
Your Wi-Fi may feel fast near your router but much weaker where the camera is installed. Phones and laptops are easier to move and usually sit closer to the router, but your Ring camera often lives on a wall, outside, or near a door. That location can block the signal and make the device appear offline or unreliable.
To find and fix signal issues, follow these steps:
- Check signal strength (RSSI) in the Ring app
- Open the Ring app and tap on your device.
- Go to ‘Device Health’.
- Look at the RSSI value, which shows Wi-Fi signal strength.
-
A number closer to 0 (for example, -40) is better. A number like -75 or lower means a weak signal that can cause video and connectivity problems.
-
Move the router or adjust its position
- Place your router in a more central, open area of your home.
- Avoid hiding it inside cabinets or behind large metal objects.
-
Raise the router off the floor and place it on a shelf or table.
-
Reduce wireless interference
- Keep the router away from microwaves, cordless phones, and baby monitors.
- If you live in a building with many neighbors, nearby networks may crowd the same Wi-Fi channel.
-
In your router settings, pick a different 2.4 GHz channel if a Wi-Fi analyzer app shows congestion.
-
Use a Wi-Fi extender or mesh Wi-Fi system
- If the camera is far from the router, a Wi-Fi extender can boost the signal toward that area.
-
For larger homes or several Ring devices, a mesh Wi-Fi system provides more even coverage and fewer dead zones.
-
Re-check the RSSI and test the camera
- After changing placement or adding equipment, return to the Ring app’s Device Health screen.
- Confirm that the RSSI value improved.
- Test Live View and motion alerts to see whether the connection is now stable.
If you now have a strong signal but your Ring camera still refuses to connect or keeps dropping offline, your router’s software settings may be causing compatibility problems. Tuning those settings is the next logical step.
Optimize Your Router Settings for Ring and Other Smart Devices
Modern routers ship with advanced features that try to optimize speed, security, and device management. These can help, but some options can confuse or block smart home devices like Ring cameras. If you keep noticing that your ring camera won’t connect to WiFi while phones and laptops work fine, your router configuration is a strong suspect.
Review these key router settings:
- Wi-Fi mode and compatibility
- Log into your router’s admin page in a web browser. The address is often something like 192.168.0.1 or 192.168.1.1.
- Check the Wi-Fi mode for the 2.4 GHz band.
- Use a mixed mode such as b/g/n or b/g/n/ax instead of a very new standard only.
-
Mixed mode helps older or simpler devices connect reliably.
-
Security type and encryption
- Ring devices support WPA2 and often WPA2/WPA3 mixed mode.
- Avoid outdated WEP and do not use ‘open’ networks without a password.
-
If you set the router to WPA3 only and the camera will not connect, switch to WPA2 or WPA2/WPA3 mixed mode and test again.
-
Band steering and ‘smart connect’ features
- Many routers try to move devices between 2.4 GHz and 5 GHz automatically.
- This ‘band steering’ can confuse smart devices that expect to stay on one band.
-
If you see random dropouts or failed setups, turn off band steering or ‘smart connect’ and try again.
-
MAC address filtering and access control
- If you turned on MAC address filtering, your router will only allow listed devices.
- Find the Ring camera’s MAC address on its label or in the app (if it has connected before).
-
Make sure the MAC address appears on the allowed list, not blocked.
-
Guest network and AP isolation
- Some guest networks use isolation settings that stop devices from seeing each other.
- That security feature can block your Ring camera from reaching the Ring servers properly.
- If the camera is on a guest network and will not connect, either disable isolation or move it to the main network.
Once you adjust your router settings, restart both the router and the camera. If the camera still will not connect or keeps failing setup, a clean reset and re-add in the Ring app is often the most effective next move.
Reset and Re-Add Your Ring Camera in the App
When you know your Wi-Fi network and router settings look good, but the camera still misbehaves, resetting the device can clear corrupted data or failed updates. Think of this as giving the camera a fresh start on a known-good network.
Follow this sequence for the best results:
- Remove the device from the Ring app
- Open the Ring app and tap the problem camera.
- Go to ‘Device Settings’.
- Select ‘Remove Device’ and confirm.
-
This clears the existing configuration so you can set it up from scratch.
-
Perform a hard reset on the camera
- Find the reset button on your specific Ring model.
- Press and hold it for the time listed in the manual, often 15 to 20 seconds.
-
Watch for the light pattern that shows the camera is now in setup mode.
-
Re-run the setup process
- In the Ring app, tap ‘Set Up a Device’.
- Choose the correct device type, such as doorbell or security camera.
- Follow the on-screen instructions.
-
When prompted, choose your Wi-Fi network and enter the password you verified earlier.
-
Stay close to the router during setup
- Stand near the router while you complete setup on your phone.
-
Keeping the phone and camera close to the Wi-Fi source reduces interference during the connection process.
-
Test Live View and motion alerts
- After setup finishes, test Live View in the app.
- Trigger motion by walking in front of the camera.
- Confirm that notifications arrive quickly and video loads without errors.
If the camera still fails setup or drops offline soon after, despite a reset and strong Wi-Fi, there may be a power or hardware issue. These problems often look like Wi-Fi errors, so it is important to rule them out.
Spot Power and Hardware Issues That Look Like Wi-Fi Problems
Not every ‘my ring camera won’t connect to WiFi’ complaint comes from the network. A device with bad power, a failing battery, or physical damage can disconnect repeatedly or refuse to join the network at all. These issues can mimic connection problems, so you should check them before you dig deeper into advanced network tools.
Look at these areas:
- Battery power for battery-based models
- In the Ring app, open ‘Device Health’ and check the battery level.
- If the battery is low, fully charge it and try again.
-
Older batteries can show a reasonable charge level but drop voltage under load, causing the camera to reboot or disconnect.
-
Power supply for wired models
- Inspect the power adapter or transformer that feeds the camera.
- Make sure the plug is secure and the cable is not damaged.
-
If the camera is hard-wired to existing doorbell wiring, confirm that connections are tight and the transformer meets Ring’s power requirements.
-
Environmental conditions
- Check the camera’s placement for exposure to extreme heat, cold, or moisture.
- If the device operates outside its rated temperature range, it may shut down or behave erratically.
-
Ensure proper mounting and weather protection as recommended by Ring.
-
Signs of physical damage
- Look for cracks in the housing, water inside the lens, or corrosion on metal contacts.
- If the camera has fallen or was hit, internal damage might prevent it from starting or joining Wi-Fi.
If power and hardware all appear normal but the connection issues continue, it is time to use more detailed network tests. These diagnostics help you see what is really happening between your camera, router, and the internet.
Advanced Diagnostics for Stubborn Connection Problems
Some problems are not obvious at a glance. Your internet might seem fine, but your Ring camera still fails to connect or keeps going offline. Advanced diagnostics let you measure signal quality, bandwidth, and interference more precisely so you can identify hidden causes.
Try these diagnostic steps:
- Run a speed test near the camera location
- Stand with your phone close to where the camera is mounted.
- Connect to the same Wi-Fi network and run an internet speed test.
- Pay special attention to upload speed, not just download.
-
For a smooth Ring experience, aim for at least 1 to 2 Mbps of consistent upload speed per camera.
-
Use a Wi-Fi analyzer app
- Install a Wi-Fi analyzer on your phone.
- Scan for nearby networks and note which channels they use.
-
If your router shares a busy channel with several neighbors, change your channel in the router settings to a less crowded one.
-
Test with a mobile hotspot
- Create a hotspot on your phone or another device.
- Put the Ring camera into setup mode and try connecting it to the hotspot.
-
If the camera connects and works properly on the hotspot, your home router or ISP configuration is likely the problem, not the camera itself.
-
Check router logs if available
- Some routers keep logs of connection attempts and errors.
- Look for repeated connection failures or authentication errors around the time you try to connect the Ring camera.
-
If you see many failures for the same MAC address, share that information with support.
-
Watch for patterns in disconnections
- Note when the camera goes offline: during heavy streaming, at certain times of day, or after the router reboots.
- Patterns can point to overloaded bandwidth, scheduled tasks on the router, or intermittent ISP issues.
At this point, you have done more than most users. If your Ring camera still will not connect to Wi-Fi after all these checks, you should consider getting help from Ring support or your internet provider. They can dig even deeper and help you decide whether you need a replacement device or a network upgrade.
When to Contact Ring Support or Your Internet Provider
Most ‘my ring camera won’t connect to WiFi’ issues resolve after careful checks of the network, router, and device. If you have followed all the steps so far and still cannot get a stable connection, it is reasonable to bring in expert help.
You should contact Ring support when:
- The camera will not go into setup mode even after a hard reset.
- The device never appears in the Ring app during setup.
- The camera fails to connect on multiple different networks, including a mobile hotspot.
- You see clear signs of hardware or power failure.
Prepare for the support session:
- Write down your Ring camera model and serial number.
- Make a list of the troubleshooting steps you have already tried.
- Take screenshots of error messages and Device Health pages.
You should contact your internet provider (ISP) when:
- Other devices also drop connection or slow down often.
- Speed tests show unstable or low speeds even near the router.
- You suspect that the ISP-supplied modem or router is failing or misconfigured.
With help from Ring and your ISP, you can address rare or complex issues and decide whether new hardware or a different setup is the best long-term solution. Once everything works, the final step is to keep your Ring system and network healthy so you do not have to repeat this process.
Prevent Future Ring Wi-Fi Issues in Your Smart Home
After you finally fix a tough connection problem, you want your Ring cameras to stay stable. A few good habits will reduce the chances that you will be searching for ‘my ring camera won’t connect to WiFi’ again in a few months.
Consider these best practices:
- Plan your Wi-Fi coverage
- Place your router in a central, open area instead of a corner or closet.
- Use mesh Wi-Fi or extenders in larger homes or where you have outdoor cameras.
-
Check the RSSI value in the Ring app whenever you move or add a device.
-
Keep firmware and apps updated
- Enable automatic updates for your router if the option exists.
- Keep the Ring app updated on every phone or tablet that you use.
-
Allow Ring devices to update their firmware when prompted in the app.
-
Reboot network gear periodically
- Restart your router and modem occasionally to clear temporary glitches.
-
If you notice performance issues on a schedule, consider setting a routine reboot at a low-usage time.
-
Monitor network load as you add devices
- Track how many devices use your Wi-Fi for video, gaming, and streaming.
- Heavy use can affect camera video quality and delay notifications.
-
When your smart home grows, plan for a router or internet speed upgrade.
-
Use a dedicated IoT or guest network when possible
- Many routers let you create a separate network for smart devices.
- This can improve reliability and security by isolating IoT devices from your main laptops and phones.
By planning your Wi-Fi layout, keeping software updated, and watching network load, you can turn a one-time fix into a long-term solution. Your Ring cameras will stay connected more reliably, and your overall smart home experience will be smoother and more secure.
Conclusion
If you feel stuck repeating ‘my ring camera won’t connect to WiFi’, it is easy to assume something is badly broken. In reality, most Ring connection issues come down to a few root causes: weak signal, incorrect password or network choice, tricky router settings, or power and hardware problems. By moving step by step, you can isolate the real cause.
You started by checking basic internet access and Ring service status, then confirmed your Wi-Fi network and password. You learned how to measure and improve signal strength, how to tune router settings for smart devices, and how to reset and re-add a stubborn camera. You also saw how to spot power and hardware issues and use advanced diagnostics like speed tests, Wi-Fi analyzers, and mobile hotspots.
With these tools and habits, you can bring your Ring camera back online and keep it that way. Your smart home will feel more reliable, and your cameras can go back to doing what they do best: helping you watch over the places that matter most.
Frequently Asked Questions
Why does my Ring camera say it has a poor Wi-Fi connection even when my internet is fast?
Fast internet at your router does not always mean a strong signal at your camera. The camera may sit far from the router or behind thick walls and objects that weaken Wi-Fi. Other electronics like microwaves and cordless phones can also add interference. Check the RSSI value in the Ring app’s Device Health screen. If it shows a weak signal, move the router, use an extender or mesh node, or adjust camera placement to improve coverage near the device.
Can my Ring camera connect to a 5 GHz Wi-Fi network, or does it need 2.4 GHz only?
Most Ring cameras work best on 2.4 GHz Wi-Fi because it travels farther and passes through walls more easily. Some newer models may support 5 GHz, but many still rely on 2.4 GHz for stable connections. If your camera fails to connect or frequently disconnects, choose the 2.4 GHz network during setup. If your router uses a single combined network name for both bands, consider splitting the bands in the router settings so you can select 2.4 GHz directly for your Ring camera.
Will resetting my Ring camera delete my videos or recorded events?
Resetting a Ring camera and removing it from the app does not delete videos stored in the Ring cloud. Your recorded events remain linked to your Ring account and any active subscription, not to the device’s local memory. However, you will lose device-specific settings such as motion zones, notification preferences, and Wi-Fi details. After you re-add the camera, you will need to configure those settings again, but your previous cloud recordings will still be available in the Ring app if your plan supports history access.