How to Connect Nest Doorbell to New Wi‑Fi: A Complete 2024 Setup & Troubleshooting Guide
Introduction
Changing your internet provider, upgrading your router, or even just renaming your Wi‑Fi can cause one big headache: your Nest doorbell suddenly goes offline. The camera stops streaming, notifications stop coming, and visitors end up knocking like it is 1990.
You do not need to be a technician to fix this. Connecting a Nest doorbell to a new Wi‑Fi network is straightforward if you follow clear steps and know when you need a simple change in the app versus a full reset.
This guide walks you through every method for how to connect Nest doorbell to new WiFi, from the easiest app‑only solution to a complete factory reset. You will also learn how to fix common connection issues and optimize your router so your doorbell stays online and responsive in 2024 and beyond.
We will start with what you need to prepare, then move into step‑by‑step methods, troubleshooting, and long‑term optimization. Each section builds on the last so you can work from the simplest fixes to the more advanced ones.
What You Need Before Connecting Your Nest Doorbell to New Wi‑Fi
Before you change any settings, it helps to gather a few key details and check your setup. This prevents repeated failures, avoids guesswork, and saves time during the reconnection.
Check Your Nest Doorbell Model and App Requirements
First, confirm which Nest doorbell you own. The main current models are:
- Nest Doorbell (battery)
- Nest Doorbell (wired, 2nd gen)
- Nest Hello (older wired model, often just called ‘Nest Doorbell’)
Newer Nest doorbells use the Google Home app. Some older Nest Hello devices may also appear in the Nest app, but Google now directs most users to Google Home.
Do this:
- Open the Google Home app on your phone.
- Confirm the doorbell appears in your device list.
- Note the exact model name shown in the app.
Check that your phone’s operating system and the Google Home app are up to date. Updates often fix connection bugs, improve pairing reliability, and add support for new router standards.
Gather Your New Wi‑Fi Network Name and Password
Next, you need the details for the new Wi‑Fi network:
- Network name (SSID) exactly as shown, including capital letters.
- Wi‑Fi password, typed carefully.
If you changed routers but kept the same SSID and password, your Nest doorbell may reconnect automatically. But if any detail changed, you must update the network information in the app.
If your router broadcasts both a 2.4 GHz and 5 GHz network, note both names. Nest doorbells usually prefer or require 2.4 GHz for range and stability, especially when mounted outside.
Make Sure Your Phone Is on the New Wi‑Fi and Updated
Your phone or tablet acts as the bridge between the Nest doorbell and your router during setup. To avoid issues:
- Connect your phone to the new Wi‑Fi network.
- Turn off VPNs and ad‑blocking DNS apps during setup.
- Make sure Bluetooth is on, because some steps use it.
An updated phone and app reduce pairing problems and repeated ‘Can not connect’ messages and ensure the Google Home app can see the doorbell properly.
Confirm Power and Physical Access to the Doorbell
Finally, check that you can reach the doorbell and that it has power:
- For a wired Nest doorbell: confirm the status light is on or pulsing.
- For a battery Nest doorbell: confirm it is charged and seated correctly in the mount.
If the doorbell has no power, fix that first. Wi‑Fi troubleshooting will not help a device that is not turning on.
With your model identified, your phone and apps updated, and your Wi‑Fi details ready, you are in a strong position to reconnect. Next, you will see how Nest doorbells handle Wi‑Fi so you can pick the best method for your situation.
Understanding How Nest Doorbell Wi‑Fi Works
It helps to know why your Nest doorbell goes offline when you change routers or passwords. A basic understanding of Wi‑Fi bands and security will guide your router settings and prevent repeated dropouts.
Why Wi‑Fi Changes Break the Connection
Your Nest doorbell stores:
- The Wi‑Fi network name (SSID)
- The password
- Security mode details
When you change any of these, the doorbell still tries to connect using the old information. This is why:
- Changing ISPs and getting a new router with a new network name breaks the link.
- Renaming your network without updating the doorbell will also break the link.
- Changing your Wi‑Fi password requires you to update the doorbell as well.
The device can not guess the new settings. You must update them through the app or by re‑running setup.
2.4 GHz vs 5 GHz and Which Band Your Doorbell Uses
Most Nest doorbells connect best to 2.4 GHz Wi‑Fi. Reasons include:
- 2.4 GHz has greater range, especially through walls and doors.
- Many doorbells are installed outside, far from the router.
Some routers combine 2.4 GHz and 5 GHz under one name and try to steer devices between bands. This can cause issues if the router pushes the doorbell to 5 GHz where the signal is weak.
If you see frequent disconnects, you may need:
- A separate 2.4 GHz SSID, or
- To turn off aggressive band steering features like ‘smart connect’ for testing.
Security Settings (WPA2/WPA3) and Compatibility
Modern routers often use WPA2 or WPA3 for security. Your Nest doorbell supports standard, modern encryption, but complicated enterprise settings or unusual firewall defaults can block connections.
Stick with:
- WPA2‑Personal or WPA3‑Personal
- A strong but simple password using letters, numbers, and symbols
Avoid captive portals (common in hotels) or guest networks that isolate devices, unless you know how to configure them for smart home devices.
With this background in mind, you can now choose the right method for connecting your Nest doorbell to new Wi‑Fi. The next sections walk you through three practical approaches, starting with the least disruptive option.
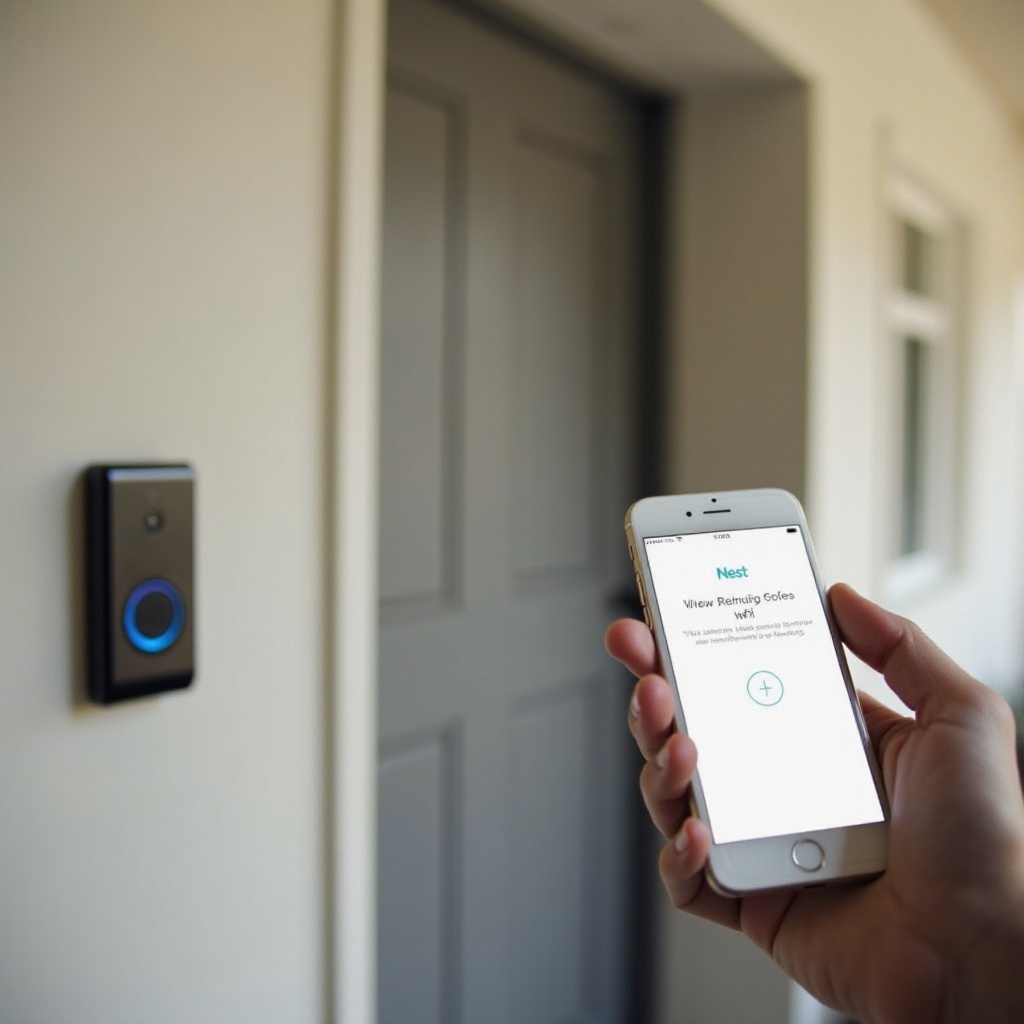
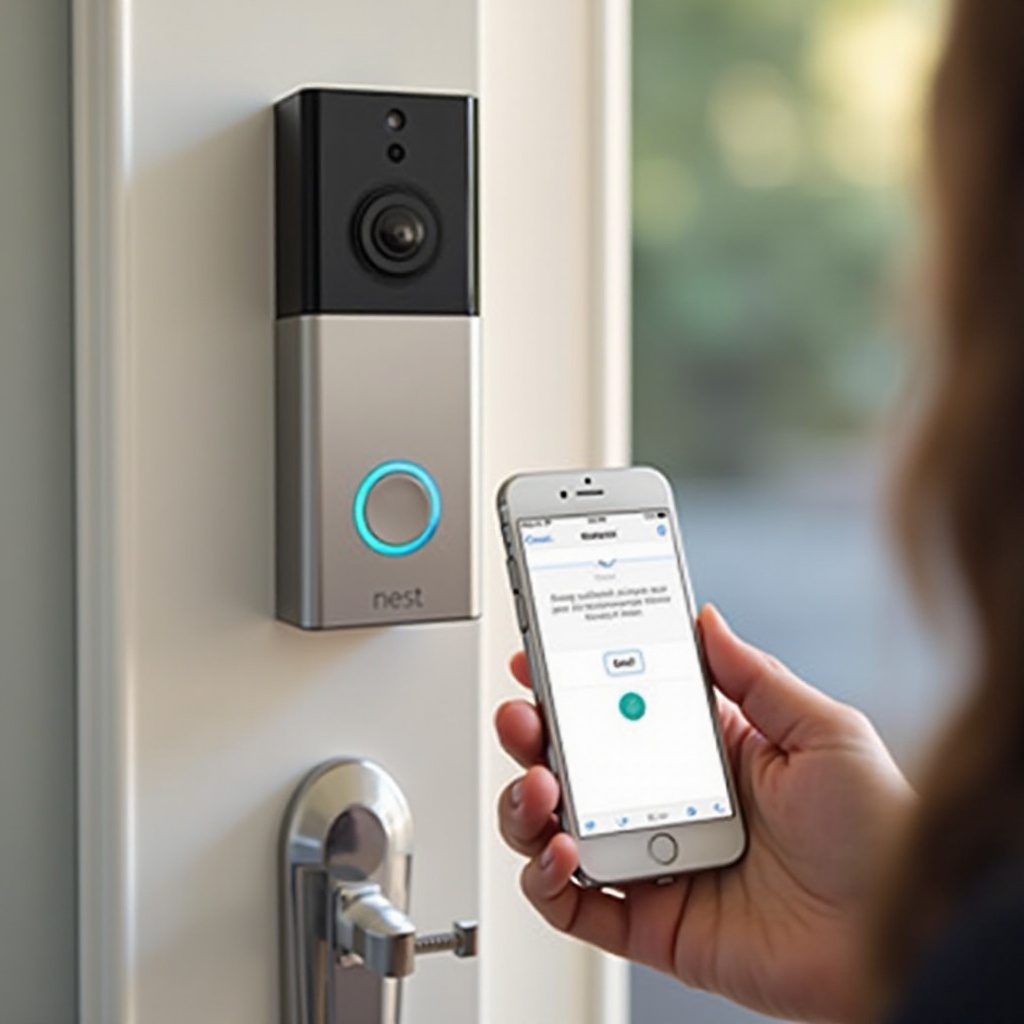
Method 1 – Change Wi‑Fi for Nest Doorbell Using the Google Home App
If your doorbell still appears online or only recently went offline, start with this method. It is the least disruptive and keeps your existing settings, zones, and automations intact.
Open the Google Home App and Locate Your Nest Doorbell
Follow these steps:
- Open the Google Home app on your phone.
- Make sure you are in the correct ‘Home’ at the top (if you have more than one).
- Find your Nest doorbell tile on the main screen.
If the doorbell shows as ‘Offline’, you can still tap it to view details and continue.
Access Device Settings and Network Options
Once you tap the doorbell tile:
- Tap the gear icon (Settings) in the top right corner.
- Look for options labeled ‘Device information’, ‘Network’, or ‘Wi‑Fi’.
Depending on your model, you may see:
- Wi‑Fi network name
- Signal strength
- IP address
If there is a direct option to change Wi‑Fi, choose it. If not, you may need to remove and re‑add the device, which we will cover in Method 2.
Switch to the New Wi‑Fi Network Step by Step
When you see the Wi‑Fi settings:
- Select ‘Forget’, ‘Change’, or ‘Update’ Wi‑Fi, depending on what the app shows.
- Confirm that you want to switch networks.
- Allow the app to search for available Wi‑Fi networks.
- Choose your new Wi‑Fi SSID from the list.
- Enter the new Wi‑Fi password exactly as it is configured on your router.
Stay close to the doorbell and router while this happens. The app will show progress as it connects and may ask you to retry if the signal is weak.
Confirm Live View, Notifications, and Event History
When the app shows the doorbell as ‘Online’ again:
- Tap to view the live video feed and check for smooth streaming.
- Press the doorbell button to test notifications on your phone.
- Check recent events to see if new motion or ring events appear.
If everything works, you are done. If you can not find a ‘Change Wi‑Fi’ option or the connection keeps failing, move on to Method 2, which gives you a clean setup without jumping straight to a factory reset.

Method 2 – Remove and Re‑Add Your Nest Doorbell on the New Wi‑Fi
Sometimes the app will not let you change Wi‑Fi directly, or the configuration is too corrupted. Removing the device from your account and adding it again often fixes stubborn problems while still avoiding a full factory reset.
When You Should Remove the Device Instead of Simple Switching
Use this method if:
- The doorbell shows offline and will not reconnect after a simple change.
- The Google Home app shows errors when you try to change Wi‑Fi.
- You moved to a new home and want a clean setup with new rooms and automations.
Removing the device does not cancel your Nest Aware subscription, but it may affect how event history appears, depending on your plan and region.
How to Remove Your Nest Doorbell from the Google Home App
To remove the device:
- Open the Google Home app.
- Tap your Nest doorbell.
- Tap the gear icon (Settings).
- Scroll down and tap ‘Remove device’ or ‘Remove from home’.
- Confirm the removal when the app asks.
After removal, the doorbell will no longer appear in your device list. It will need to be added again like a new device.
Put the Doorbell into Setup Mode on the New Network
Most Nest doorbells enter setup mode when you remove them, but if not:
- For battery models:
- Remove the doorbell from its mount.
- Press and hold the reset or setup button (often on the back) until the status light pulses.
- For wired models:
- Use the reset pinhole or front button as described in your manual.
- Wait for the doorbell to announce that it is ready for setup or shows a pulsing light.
Your doorbell is now ready to pair with the new Wi‑Fi through the app.
Add the Doorbell Again and Reconfigure Basic Settings
Now add the doorbell back:
- In the Google Home app, tap the ‘+’ icon.
- Select ‘Set up device’ → ‘New device’.
- Choose your Home.
- Allow the app to search for nearby Nest devices in setup mode.
- Follow the on‑screen steps to scan the QR code on the doorbell, if prompted.
- When asked, choose your new Wi‑Fi network and enter the password.
Once connected, you will:
- Choose a room name, such as ‘Front Door’.
- Set basic preferences for notifications.
- Reconnect to your existing chime if needed.
If this still does not resolve your connection issue, a full factory reset may be necessary. The next method explains when and how to do that safely.
Method 3 – Factory Reset and Fresh Setup on New Wi‑Fi
A factory reset wipes all stored settings from the doorbell. This is the strongest option and fixes many deep configuration problems, but you must set everything up again from scratch.
Signs You Need a Factory Reset to Fix Wi‑Fi Problems
Consider a factory reset if:
- Your Nest doorbell refuses to enter setup mode.
- The app can not find the device even when it is powered on.
- You have repeated ‘Connection failed’ errors on multiple phones.
- You moved and want to ensure no old configuration remains.
Before you reset, note any important settings such as activity zones, schedules, and integrations you want to recreate later.
How to Factory Reset a Wired Nest Doorbell
Steps may vary slightly by model, but in general:
- Keep the doorbell powered.
- Locate the reset button or pinhole on the device.
- Press and hold the button for about 10–15 seconds.
- Release when the light ring changes color or you hear a chime or spoken message.
The doorbell will restart. After a minute or two, it should be in setup mode, ready to be added again through the Google Home app.
How to Factory Reset a Battery Nest Doorbell
For the battery model:
- Remove the doorbell from its mounting bracket.
- Locate the reset or setup button (often on the back or near the base).
- Press and hold the button for around 10–15 seconds.
- Release when the LED flashes or you hear a confirmation sound.
Allow the doorbell to reboot. When the status light pulses, you can start setup.
Run the Initial Setup Wizard on the New Wi‑Fi Network
After a factory reset:
- Open the Google Home app.
- Tap the ‘+’ icon → ‘Set up device’ → ‘New device’.
- Select your Home and follow the prompts.
- Scan the QR code on the doorbell when asked.
- Choose your new Wi‑Fi network and enter the password.
Once connected:
- Name your doorbell (for example, ‘Front Door’).
- Set up notifications and activity zones again.
- Re‑link automations like smart lights or announcements if you use them.
If the reset and fresh setup worked but you still see offline issues or weak signal, the problem usually lies in the network itself. The next section focuses on common network problems and how to fix them.
Fixing Common Problems When Connecting Nest Doorbell to New Wi‑Fi
Even when you follow every step, some Wi‑Fi setups cause trouble. Here are common issues and practical ways to resolve them so your Nest doorbell stays reliably connected.
Doorbell Not Showing Up in the App During Setup
If the app can not find your Nest doorbell during setup:
- Confirm the doorbell has power and a visible status light.
- Move your phone closer to the doorbell.
- Turn Bluetooth off and then on again on your phone.
- Restart your phone and retry setup.
If it still fails, perform a simple restart on the doorbell:
- Briefly press the reset button (do not hold long enough for factory reset).
- Wait for it to reboot, then retry setup from the Google Home app.
‘Can not Connect to This Network’ or ‘Offline’ Errors
These errors often point to:
- Wrong Wi‑Fi password.
- Weak signal at the front door.
- Incompatible or complex network settings.
Try this:
- Confirm the password by connecting another device, such as a laptop or phone.
- Move your router closer to the door or temporarily move the doorbell closer for setup.
- If your router supports both bands with one SSID, try creating a separate 2.4 GHz SSID.
- Disable any overly strict firewall settings for testing, then secure again afterward.
If a guest or IoT network exists, try connecting the doorbell to that network, provided it allows device‑to‑cloud communication.
Weak Signal at the Front Door and Interference Issues
A doorbell mounted outside often sits at the edge of your Wi‑Fi coverage. You may see:
- Choppy or pixelated video.
- Delayed notifications.
- Frequent disconnects, especially at busy times.
To improve signal:
- Move the router to a more central location if possible.
- Avoid placing the router behind thick walls, metal cabinets, or inside closets.
- Reduce interference from baby monitors, microwaves, and cordless phones.
For long distances or brick walls, a mesh Wi‑Fi system or a Wi‑Fi extender near the front door can make a big difference.
Router Settings, Channels, and Band Steering Problems
Advanced router features sometimes cause more harm than good for smart devices:
- ‘Smart connect’ or aggressive band steering may flip your doorbell between 2.4 and 5 GHz.
- Auto channel selection can choose crowded channels with more interference.
If you suspect router issues:
- Log in to your router’s admin page.
- Temporarily turn off ‘smart connect’ or combined SSID features.
- Lock the 2.4 GHz band to channels 1, 6, or 11, which are usually more stable.
- Save changes and restart the router, then retry connecting the doorbell.
After you get a solid, stable connection, you can fine‑tune or re‑enable features if needed. Once your connection is stable, you can focus on long‑term optimization to keep the doorbell online and responsive.
Optimizing Your Network for a Stable Nest Doorbell Connection
Once your Nest doorbell connects to the new Wi‑Fi, you want it to stay that way. A few network optimizations can deliver smoother video, faster alerts, and fewer offline events.
Best Router Placement for Front Door Wi‑Fi Coverage
Router placement is the simplest improvement you can make:
- Place the router in a central, open area of your home.
- Avoid corners, basements, and closets when possible.
- Keep it away from large metal objects and thick concrete walls.
If your front door is far from the router, consider moving the router closer or adding another access point between the router and the doorbell.
Using Mesh Wi‑Fi or Extenders for Outdoor Devices
Mesh Wi‑Fi systems and extenders help cover large homes and outdoor spots:
- A mesh system uses multiple nodes to spread coverage evenly.
- A Wi‑Fi extender repeats the signal into weak areas.
Place a node or extender:
- Inside the home but close to the front door.
- Midway between the main router and the doorbell if direct placement is not possible.
This setup reduces video buffering and frequent offline events, especially at the doorbell’s location.
Creating a Smart‑Home‑Only 2.4 GHz SSID
Many users create a specific Wi‑Fi network just for smart home devices:
- 2.4 GHz only, for better range.
- Simple SSID and password, but still secure.
Benefits include:
- Less congestion from laptops, phones, and streaming boxes.
- Easier troubleshooting when only smart devices use that network.
If your router supports multiple SSIDs, set one up for something like ‘SmartHome_2G’ and connect your Nest doorbell and other IoT devices to it.
Updating Router Firmware and Enabling QoS
Router firmware updates improve stability and security:
- Log in to your router’s admin page.
- Check for firmware updates.
- Install the latest stable version.
Some routers offer QoS (Quality of Service):
- Prioritize video streaming or specific devices like your Nest doorbell.
- Ensure the doorbell gets enough bandwidth even when the network is busy.
A well‑tuned network keeps your Nest doorbell responsive and reliable, but you also need to protect that connection and your account. The next section covers key security and privacy steps to take after you change Wi‑Fi.
Security and Privacy Tips After Changing Wi‑Fi
Updating Wi‑Fi is a great time to review your security. Your doorbell sends video and audio over the internet, so you should protect both your network and your Google account.
Use Strong Wi‑Fi Passwords and Modern Encryption
Always:
- Use WPA2‑Personal or WPA3‑Personal on your router.
- Avoid old, insecure modes like WEP.
- Create a long password with a mix of letters, numbers, and symbols.
Do not share your main Wi‑Fi password casually. If guests need access, consider a guest network with its own password and limited permissions.
Review Who Has Access to Your Google Home
Anyone added as a member to your Google Home may see the doorbell and its feed:
- Open the Google Home app.
- Tap your profile picture → ‘Home settings’ → ‘Household’.
- Review the list of members.
Remove people who should no longer have access, such as former roommates, guests, or tenants.
Turn On Two‑Step Verification for Your Google Account
Your Google account controls your Nest doorbell. Protect it with:
- Two‑step verification (2FA) using SMS or an authenticator app.
- A strong, unique password that you do not reuse on other sites.
If someone gains access to your account, they could view your camera feeds or change your settings. Two‑step verification adds a strong layer of protection.
Once your device is connected, your network is stable, and your account is secure, you can rely on your Nest doorbell as a key part of your home security.
Conclusion
Learning how to connect Nest doorbell to new WiFi does not have to be complicated. Start with the simplest method in the Google Home app, and only move to removing the device or performing a factory reset if you must. Each method builds on the last: adjust settings, re‑add the doorbell, and finally reset when nothing else works.
If you still see connection issues after a successful setup, focus on your Wi‑Fi environment. Router placement, band selection, and interference all play a big role in doorbell performance. A stable 2.4 GHz connection, a good signal at the front door, and up‑to‑date router firmware will keep your Nest doorbell online.
With your device properly connected, optimized, and secured, you can rely on clear video, timely alerts, and a smooth smart home experience every time someone walks up to your door.
Frequently Asked Questions
Do I need to delete my Nest Doorbell before connecting it to a new Wi‑Fi network?
Not always. If the doorbell appears in the Google Home app and offers a ‘Change Wi‑Fi’ or similar option, you can simply update the network there. Deleting (removing) the device and adding it again is helpful when the doorbell is stuck offline, the app can not change the Wi‑Fi directly, or you move to a new home and want a clean setup. Try updating Wi‑Fi in the app first, then remove and re‑add the device only if that fails.
Will I lose my Nest Aware recordings when I change Wi‑Fi on my Nest Doorbell?
Changing Wi‑Fi does not delete your Nest Aware subscription or stored cloud recordings. Your video history is tied to your Google account and subscription, not to a specific Wi‑Fi network. However, if you remove a device and leave it disconnected for a long time, how history appears can vary by region and plan. In normal cases, updating Wi‑Fi or re‑adding the doorbell should not erase past recordings, but always check your Nest Aware terms for details.
What should I do if my Nest Doorbell keeps disconnecting from the new Wi‑Fi?
Frequent disconnections usually point to weak signal or router settings. Start by moving the router closer to the front door or away from thick walls and metal objects. Create a dedicated 2.4 GHz SSID and connect the doorbell to it, then temporarily turn off ‘smart connect’ or aggressive band steering. Update your router firmware and consider a mesh system or Wi‑Fi extender near the front of your home. If the Wi‑Fi is strong and other devices work fine, restart the doorbell and app, and check for any pending firmware updates for the doorbell itself.