How to Perform an AirPods Factory Reset (All Models) for Fast Fixes in 2024
Introduction
AirPods should connect in seconds and deliver clear, stable sound. When they refuse to pair, cut out at random, or only play in one ear, they become more of a headache than a convenience. An AirPods factory reset is one of the most reliable ways to bring them back to normal.
A factory reset wipes the pairing and configuration data stored on your AirPods so you can set them up again from scratch. This fresh start often fixes Bluetooth glitches, sync problems, and strange behavior that simple reconnects do not solve. The key is to reset them the right way for your specific model and to know what to do if the reset fails.
In this guide, you will learn how to perform an AirPods factory reset on every model: AirPods (1st, 2nd, and 3rd generation), AirPods Pro (1st and 2nd generation), and AirPods Max. You will also see how to reset AirPods without an iPhone, how to test them afterward, and how to spot signs of deeper hardware issues.
Before you start pressing buttons, it helps to understand what an AirPods factory reset really does and what it cannot change.

What Does an AirPods Factory Reset Actually Do?
An AirPods factory reset clears the connection history and settings stored on the earbuds and their case. Think of it as removing all saved device relationships so your AirPods can behave as if they just came out of the box.
When you perform an AirPods factory reset, it typically:
- Removes existing Bluetooth pairings between your AirPods and all devices.
- Breaks the link between your AirPods and your Apple ID until you set them up again.
- Clears minor firmware glitches that can cause odd pairing or audio behavior.
What it does not do is just as important:
- It does not replace or repair worn or damaged batteries.
- It does not fix physical damage such as cracks, dents, or water damage.
- It does not install new firmware or upgrade your AirPods software version.
You can think of an AirPods factory reset as a deep connection reset rather than a repair. It is more powerful than simply forgetting the device in Bluetooth settings, but it cannot overcome hardware faults.
With this in mind, you should decide when a factory reset makes sense and when a lighter fix or a hardware check is more appropriate.
When You Should (and Should Not) Factory Reset AirPods
Not every hiccup calls for a full AirPods factory reset. Sometimes, turning Bluetooth off and on or forgetting and re-pairing your AirPods is enough. To save time, use factory reset for persistent or repeat issues that do not respond to basic steps.
Common AirPods problems a factory reset can fix
A factory reset is often helpful if you notice:
- AirPods will not connect to your iPhone, iPad, Mac, or other devices, even after you forget and re-pair them.
- Only one AirPod connects, charges, or plays sound while the other appears dead.
- AirPods keep jumping between devices at the wrong time, ignoring your preferences.
- Audio cuts out, stutters, or goes out of sync across multiple apps and devices.
- AirPods Pro noise cancellation or Transparency mode behaves inconsistently after you have checked all settings.
These problems often come from corrupted pairing data or small software glitches inside the AirPods themselves. An AirPods factory reset wipes that data so you can start again clean.
Issues a factory reset usually cannot solve
Some issues are unlikely to improve with a reset:
- Severely reduced battery life on old AirPods that have been used for years.
- A case or earbud that never charges, even when you change cables, adapters, and outlets.
- Visible physical or liquid damage to the earbuds or case.
You can still try a reset if you are unsure, but if nothing changes afterward, you should treat the problem as a likely hardware issue and consider service or replacement.
If you decide a factory reset is the right step, you will get better results if you prepare your AirPods and devices properly first.
Prep Checklist Before You Factory Reset Your AirPods
Taking a few minutes to prepare your AirPods can prevent failed resets and confusing behavior. Before you start your AirPods factory reset, go through this short checklist.
1. Charge your AirPods and charging case
Make sure everything has enough power:
- Place both earbuds in the charging case.
- Check that the case has charge; if you are not sure, plug it in for at least 10 to 15 minutes.
- Use a reliable, certified charging cable and adapter.
Low battery can interrupt a reset or make the AirPods seem unresponsive while you hold the button.
2. Clean the case and charging contacts
If the earbuds do not sit properly in the case, they may not reset or charge. Dust, lint, and earwax can block the contact points.
- Remove the earbuds and inspect the inside of the case.
- Use a soft, dry, lint-free cloth to wipe the case.
- Gently clean the charging wells and contacts with a dry, soft brush or cotton swab.
- Avoid liquids and sharp tools that might damage the contacts.
Clean contacts help ensure the case can communicate with the earbuds and complete the factory reset.
3. Update iOS, iPadOS, macOS, or other devices
Your AirPods talk to your phone, tablet, or computer, so outdated software on those devices can cause issues that look like AirPods problems.
- On iPhone or iPad, open ‘Settings’ and check for software updates.
- On Mac, use ‘System Settings’ or ‘System Preferences’ to update macOS.
- On Android or Windows, install pending system and Bluetooth updates.
With your AirPods charged, cleaned, and your devices updated, you are ready to perform an AirPods factory reset. Let us start with the standard AirPods models.
How to Factory Reset AirPods (1st, 2nd, and 3rd Generation)
AirPods (1st, 2nd, and 3rd generation) all follow a similar process for a factory reset. You will remove them from your device first, then use the case button to complete the reset.
1. Forget AirPods from your iPhone or other device
On iPhone or iPad:
- Open ‘Settings’.
- Tap ‘Bluetooth’.
- Find your AirPods and tap the ‘i’ icon next to their name.
- Tap ‘Forget This Device’ and confirm.
On other devices, open their Bluetooth settings and remove or ‘forget’ your AirPods from the paired devices list.
2. Use the setup button and status light to reset
Now reset the AirPods using the case:
- Put both AirPods in the charging case and close the lid.
- Wait about 30 seconds.
- Open the lid, but keep the AirPods inside the case.
- Press and hold the setup button on the back of the case.
- Keep holding until the status light flashes amber, then flashes white.
A flashing white light means your AirPods are in pairing mode after the factory reset and are ready to connect again.
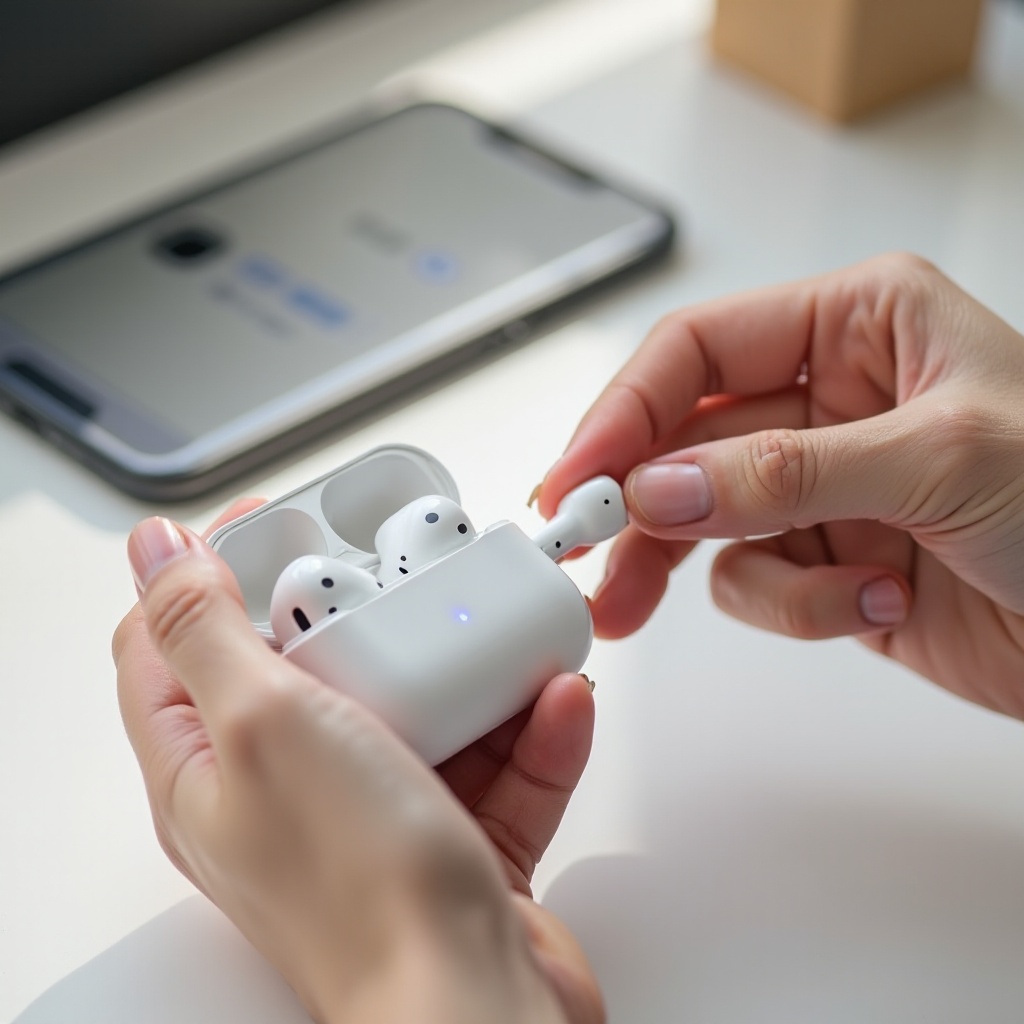
3. Re-pair your AirPods after the factory reset
On iPhone or iPad:
- Hold the open case near your device.
- Wait for the setup card to appear on screen.
- Tap ‘Connect’ and follow the prompts.
On other devices, open Bluetooth settings and select your AirPods from the available devices list.
Once you know how to reset standard AirPods, the next step is to look at AirPods Pro, which add features like Active Noise Cancellation and Transparency that you will want to reconfigure after a reset.
How to Factory Reset AirPods Pro (1st and 2nd Generation)
An AirPods factory reset on AirPods Pro is very similar to the process for standard AirPods, but you should also remember to re-enable advanced features afterward.
1. Remove AirPods Pro from all Apple and non-Apple devices
Start with your primary Apple device:
- Open ‘Settings’ on your iPhone or iPad.
- Tap ‘Bluetooth’.
- Tap the ‘i’ next to your AirPods Pro.
- Tap ‘Forget This Device’ and confirm.
If your AirPods Pro are paired with other devices, such as a Mac, Android phone, or Windows PC, remove them from those Bluetooth lists as well. This prevents those devices from trying to reconnect during or after the reset.
2. Reset using the case button and watch the LED indicators
Then perform the factory reset:
- Place both AirPods Pro in the charging case and close the lid.
- Wait about 30 seconds.
- Open the lid and leave it open.
- Press and hold the setup button on the back of the case.
- Keep holding until the front LED flashes amber and then flashes white.
The white flash signals that your AirPods factory reset is complete and they are ready to be set up as new.
3. Re-enable noise control, Transparency, and Spatial Audio
After you re-pair your AirPods Pro:
- Open ‘Settings’ on your iPhone or iPad and go to ‘Bluetooth’.
- Tap the ‘i’ next to your AirPods Pro.
- Turn on or adjust Noise Cancellation and Transparency mode.
- Set up ‘Personalized Spatial Audio’ if your device supports it, following the on-screen steps.
- Customize press-and-hold actions on the stems to control ANC modes or Siri.
With both standard AirPods and AirPods Pro covered, it is time to handle AirPods Max, which use buttons on the headphones instead of a case button.
How to Factory Reset AirPods Max
AirPods Max are over-ear headphones, and their reset process uses the Digital Crown and Noise Control button instead of a charging case button.
1. Difference between restart and factory reset on AirPods Max
AirPods Max offer two levels of reset:
- A restart, which is a quick reboot for small glitches.
- A full factory reset, which clears all settings and pairings.
Knowing which one you perform matters, so pay attention to the LED behavior.
2. Use the Digital Crown and Noise Control button correctly
To restart AirPods Max:
- Press and hold the Noise Control button and the Digital Crown together.
- Release them when the LED near the charging port flashes amber.
To perform an AirPods factory reset:
- Press and hold the Noise Control button and the Digital Crown at the same time.
- Keep holding for about 15 seconds.
- Release when the LED flashes amber and then flashes white.
The white flash confirms that the factory reset is complete and AirPods Max are in pairing mode.
3. Reconnect AirPods Max to your Apple ID and other devices
After the reset:
- Hold your AirPods Max near your iPhone or iPad.
- Wait for the setup animation and follow the instructions.
- Check Bluetooth settings to confirm AirPods Max appear under your devices.
- Verify that they show under your Apple ID device list so they work smoothly with iCloud and ‘Find My’.
If you use AirPods with Android phones, Windows laptops, or other non-Apple devices, you can still perform an AirPods factory reset without any Apple hardware. The next section covers those steps.
How to Factory Reset AirPods Without an iPhone (Android, Windows, Other Devices)
You do not need an iPhone or any Apple device to run an AirPods factory reset. The reset happens between the earbuds and the case or the headphones themselves.
1. Universal case-button method for factory reset
For AirPods and AirPods Pro:
- Place both earbuds in the charging case and close the lid.
- Wait about 30 seconds.
- Open the lid and keep the earbuds inside.
- Press and hold the setup button on the back of the case.
- Continue holding until the LED flashes amber and then flashes white.
For AirPods Max, use the Digital Crown and Noise Control button as described in the previous section.
2. Reconnecting AirPods to Android phones and tablets
On Android, AirPods work like regular Bluetooth earbuds:
- Open ‘Settings’ and go to ‘Bluetooth’ or ‘Connections’.
- Make sure Bluetooth is turned on.
- Open the AirPods case lid (or power on AirPods Max) and wait for the LED to flash white.
- Look for your AirPods in the list of available devices.
- Tap the AirPods name to pair.
You will not see Apple-only features like automatic ear detection settings or Spatial Audio controls, but audio and microphone functions will work.
3. Reconnecting AirPods to Windows laptops and PCs
On Windows 10 or Windows 11:
- Open ‘Settings’ and go to ‘Devices’ or ‘Bluetooth & devices’.
- Turn on Bluetooth if it is off.
- Click ‘Add device’ and choose ‘Bluetooth’.
- Put your AirPods in pairing mode (white flashing light).
- Select your AirPods when they appear in the device list and complete pairing.
Once you reconnect your AirPods to Android or Windows, you should test audio and calls to confirm everything works. If the reset does not seem to take effect or the LED never changes to white, you will need to troubleshoot the reset itself.
What to Do If Your AirPods Won’t Factory Reset
Sometimes the AirPods factory reset process does not start, or the light on the case never reaches the white flashing stage. Before you assume your AirPods are dead, work through a few targeted checks.
1. Check battery levels and try a different charger
Start with power:
- Place the earbuds in the case and plug the case into power for at least 15 to 20 minutes.
- Use a known good charging cable and adapter.
- Check whether the status light turns on at all when you open the lid or tap the case.
If the case does not show any light, it might have a battery or hardware fault that prevents a reset.
2. Clean the charging contacts and status light area
Poor contact between the earbuds and the case can stop the reset process from working.
- Remove the earbuds and inspect the charging wells and the metal contacts.
- Gently clean them with a dry, soft brush and a lint-free cloth.
- Make sure the earbuds sit firmly in the case and that the lid closes properly.
After cleaning, repeat the AirPods factory reset steps and watch the LED closely.
3. Remove AirPods from your Apple ID device list
If you use an Apple device, your AirPods may still be tied to your Apple ID, which can sometimes cause pairing confusion after a reset.
- On your iPhone or iPad, open ‘Settings’ and tap your name at the top to open Apple ID settings.
- Scroll down to see your devices.
- Tap your AirPods, then choose ‘Remove from Account’ if that option appears.
Once removed, try the factory reset again and then set up your AirPods as new. If the reset still fails or your AirPods remain unresponsive, the problem is likely hardware-related and you should contact Apple Support or an authorized service provider.
If the reset works, the next step is to test your AirPods thoroughly so you know your issue is truly resolved.
Testing Your AirPods After a Factory Reset
A successful AirPods factory reset should result in stable connections, balanced sound, and working microphones. A short test routine helps you confirm everything.
1. Confirm both earbuds connect and play audio
- Place both earbuds in your ears.
- Play a track or video you know well.
- Listen for sound from both ears and check for volume balance.
- If your device shows separate battery levels for each earbud, confirm that both report a charge.
If one ear is still silent or much quieter, re-seat the earbuds in the case, close the lid for 30 seconds, then test again.
2. Test call quality and microphone performance
Calls and voice messages are a good way to test the microphones:
- Make a quick phone call and ask the other person if your voice sounds clear and steady.
- Record a short voice memo and listen back to see if your voice sounds natural and loud enough.
- If the microphone sounds muffled, inspect the mesh on the earbuds for dust or debris and clean gently if needed.
3. Check ANC, Transparency, and audio sync across apps
For AirPods Pro and AirPods Max:
- Toggle between Noise Cancellation and Transparency mode using the stems or the Noise Control button.
- Confirm that each mode sounds different and that external noise is reduced or passed through as expected.
For all models:
- Test audio in several apps, such as music streaming, video apps, and social media.
- Watch for any delay between video and audio.
If everything looks and sounds normal, your AirPods factory reset was successful. The final step is to understand how often you should rely on a reset and how to avoid needing it too frequently.
How Often Should You Factory Reset AirPods? Best Practices for 2024
An AirPods factory reset is a powerful fix, but it should not become part of your daily routine. Frequent resets can hide deeper issues and waste your time.
1. Signs it is time for another factory reset
You might consider another reset if:
- The same connection problem returns across more than one device.
- Your AirPods drop audio or disconnect again after working well for a short period.
- Noise control modes or settings keep resetting themselves without your input.
In those cases, a second AirPods factory reset can help confirm whether the problem was a one-off glitch or something more persistent.
2. When a factory reset is a red flag for hardware issues
If you keep resetting and the same problems always return, treat that as a warning. You may be dealing with hardware failure, such as:
- One earbud that consistently refuses to charge, or drains extremely fast.
- A case LED that never lights, even with different chargers and outlets.
- Persistent distortion, crackling, or very low maximum volume that does not improve.
When you see these patterns, another AirPods factory reset will likely not help. Instead, check your warranty or AppleCare+ coverage and speak to Apple Support about repair or replacement options.
3. Daily habits to reduce how often you need to reset
You can prevent many issues with a few simple habits:
- Always store your AirPods in their case when you are not using them.
- Keep the earbuds and case clean and dry, and avoid moisture and extreme heat or cold.
- Use quality chargers and cables to protect the battery and internal electronics.
- Install software updates on your devices and let your AirPods update their firmware when available.
With consistent care and smart troubleshooting, an AirPods factory reset becomes an occasional tool rather than a constant chore, helping you keep your earbuds working smoothly for longer.
Conclusion
An AirPods factory reset is one of the most effective ways to fix persistent connection and audio problems across all AirPods models. By clearing old pairing data and configuration settings, you give your earbuds a fresh start that often restores reliable performance.
You have seen how to decide when a factory reset makes sense, how to prepare your AirPods and devices, and how to reset AirPods, AirPods Pro, and AirPods Max step by step. You have also learned how to reset without an iPhone, what to do if the reset will not complete, and how to test your earbuds after the process.
If repeated resets do not solve your issues, treat that as a sign of possible hardware trouble and reach out to Apple or an authorized service provider. Used correctly, though, an AirPods factory reset is a simple, powerful tool that can save you time, reduce frustration, and keep your listening experience smooth and enjoyable.
Frequently Asked Questions
Does an AirPods factory reset improve battery life or sound quality?
An AirPods factory reset does not repair worn batteries or upgrade audio hardware, but it can improve performance when glitches cause audio dropouts, volume issues, or lag. By clearing corrupted pairing data, a reset can make your AirPods feel more responsive and stable. However, if your AirPods are old and their batteries have degraded from heavy use, a reset will not restore lost capacity. In that case, only a battery or device replacement can significantly improve battery life.
Will an AirPods factory reset remove my AirPods from Find My?
A factory reset alone does not always remove your AirPods from ‘Find My’, because the association is stored with your Apple ID. When you reset and then pair your AirPods to a device signed in with your Apple ID, they usually reappear in ‘Find My’ automatically. If you plan to sell or give away your AirPods, you should remove them from your Apple ID and from ‘Find My’ in the Settings app, and then perform an AirPods factory reset. This ensures the new owner can pair and use them without activation or pairing problems.
Why does only one AirPod work even after a factory reset?
If only one AirPod works after an AirPods factory reset, start by placing both earbuds in the case, closing the lid for at least 30 seconds, and then testing again. Check your device’s Bluetooth settings to see if both earbuds report a battery level. If one earbud does not appear or never shows a charge, the issue may be a blocked charging contact, debris in the case, or a failing battery. Clean the case and contacts gently, try another reset, and test again. If the same earbud remains silent or unrecognized, it is likely a hardware issue, and you may need service or a replacement from Apple.