How to Replace Black Decker Portable Vacuum Battery Replacement
Introduction
If your Black Decker portable vacuum isn’t holding a charge like it used to, it might be time for a battery replacement. A malfunctioning battery can greatly reduce the efficiency and lifespan of your device. This comprehensive guide will walk you through the entire process of replacing the battery, ensuring that you can get back to your cleaning tasks without any hassle. No need to spend extra money on a new vacuum when all you need is a straightforward battery swap.
Tools and Materials Needed
Before you start, ensure you have the necessary tools and materials. Having everything ready will make the process smoother.
- Replacement battery compatible with your Black Decker portable vacuum
- Screwdriver (usually a Phillips head)
- User manual for your specific model
- Safety gloves
Safety Precautions
Working with batteries requires some basic safety measures to prevent any potential hazards. Here’s what you need to keep in mind:
- Turn Off and Unplug the Vacuum: Ensure the vacuum is completely off and disconnected from any power source to avoid electric shocks.
- Wear Safety Gloves: Batteries can leak chemicals harmful to the skin. Gloves will offer protection.
- Work in a Well-Ventilated Area: Battery fumes can sometimes be toxic. Working in an open, airy space minimizes inhalation risks.
- Proper Disposal of Old Battery: Follow local guidelines for battery disposal to ensure environmental safety. Dispose of old batteries at a designated recycling center.
With these precautions in mind, you can safely proceed to the next steps.
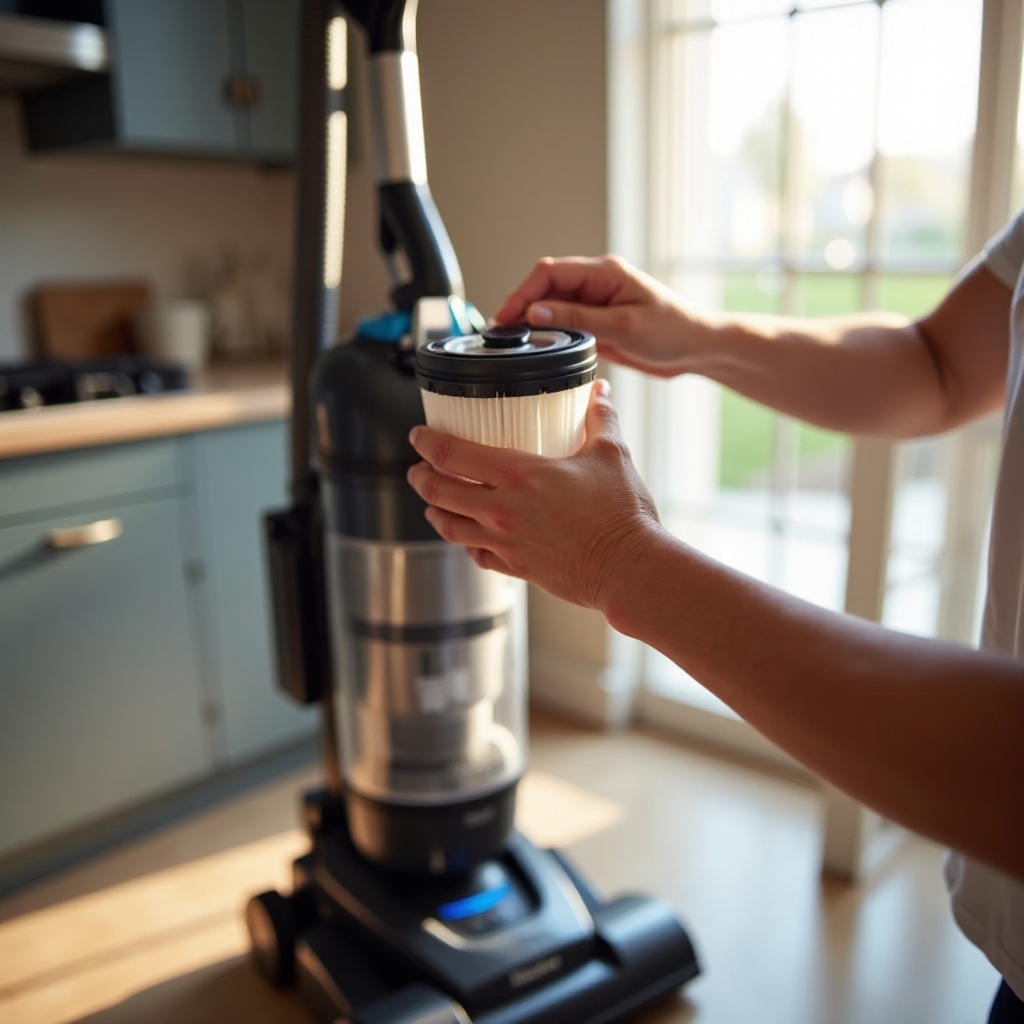
Accessing the Battery Compartment
To replace the battery, you first need to gain access to the battery compartment. The method to do this can vary between different models, so having your user manual handy can be beneficial.
- Locate the Screws: Typically, the battery compartment is secured with screws. Check the bottom or back of the vacuum for the screws.
- Remove the Screws: Use your screwdriver to carefully unscrew the screws. Keep them in a safe place where they won’t get lost.
- Open the Compartment: Gently pry open the battery compartment, taking care not to damage any internal components.
Once the compartment is open, you should be able to see the old battery clearly.
Removing the Old Battery
After accessing the battery compartment, you can proceed with removing the old battery. Follow these steps:
- Disconnect the Battery: Some models may have a simple clip or connectors. Gently disconnect these to free the old battery.
- Remove the Battery: Carefully lift the old battery out of its compartment. Be cautious not to tamper with any other internal parts.
With the old battery removed, you’re now ready to install the new battery.
Installing the New Battery
Installing the new battery is a reversal of removing the old one. Make sure you follow these steps precisely to ensure a proper fit and connection.
- Insert the New Battery: Place the new battery into the compartment, aligning it in the same orientation as the old one.
- Connect the Battery: Attach the new battery’s connectors to the corresponding clips in the compartment.
Make sure that the connections are secure but avoid applying too much force, which could damage the connectors.

Reassembling the Vacuum
After the new battery is in place, it’s time to reassemble your vacuum.
- Close the Compartment: Gently close the battery compartment, ensuring that you don’t pinch any wires.
- Screw It Shut: Using the screws you removed earlier, secure the compartment. Don’t over-tighten, as this could strip the screws or damage the casing.
Once reassembled, you’re ready to test your vacuum to make sure everything is functioning correctly.

Testing the Vacuum
To ensure the new battery installation was successful, you need to test the vacuum.
- Turn On the Vacuum: Plug in the vacuum and power it on.
- Check the Battery Indicator: Verify that the battery indicator shows a full or adequate charge.
- Test Suction Power: Run the vacuum to check if it operates with its usual efficiency.
If everything is working correctly, you’ve successfully replaced the battery.
Maintenance Tips for Battery Longevity
To maximize the lifespan of your new battery, follow these maintenance tips:
- Avoid Overcharging: Unplug the vacuum once it’s fully charged to prevent battery wear.
- Regular Use: Run the vacuum regularly to keep the battery in good condition.
- Store Properly: Store your vacuum in a cool, dry place to avoid damage to the battery.
Adhering to these simple tips can extend the life of your vacuum’s battery significantly.
Conclusion
Replacing the battery in your Black Decker portable vacuum is a cost-effective and straightforward process. By following this guide, you can extend the life of your vacuum and ensure it continues to perform at its best. Remember, safety first, and proper maintenance can go a long way in keeping your device in top shape.
Frequently Asked Questions
What type of battery does my Black Decker portable vacuum use?
Most Black Decker portable vacuums use a lithium-ion battery. Refer to your user manual for the specific type and model number.
How often should I replace my vacuum’s battery?
Typically, you should replace the battery every 2-3 years, depending on usage. If the vacuum isn’t holding charge or underperforms, it might be time for a new battery.
Can I use a third-party battery for my Black Decker vacuum?
While third-party batteries might be cheaper, it’s always best to use manufacturer-recommended batteries to ensure safety and compatibility.