How to Install a Rear-Facing Car Seat
Introduction
Child safety should always be a top priority. Proper installation of a rear-facing car seat is crucial to ensure your child’s safety while traveling. Incorrect installation can lead to serious injuries in the event of an accident. This guide will provide clear, step-by-step instructions on how to properly install a rear-facing car seat, ensuring your child’s security and your peace of mind. We will cover everything from choosing the right car seat to preparing your vehicle and conducting final safety checks. Let’s dive right in and make sure your little one is safe and sound.
Choosing the Right Rear-Facing Car Seat
Selecting the appropriate rear-facing car seat is the first step to guarantee your child’s safety. Ensure the car seat is suitable for your child’s age, weight, and height. Generally, there are two types of rear-facing car seats: infant-only seats and convertible seats. Infant-only seats are portable and typically have a weight limit of 22-35 pounds. Convertible seats can be used longer, as they have higher weight and height limits, accommodating growing children. Always check for the latest safety standards and certifications to ensure the car seat meets the required guidelines.
Once you have the right car seat, it’s time to prepare your vehicle for a secure installation.
Preparing Your Vehicle for Installation
Before you begin installing the car seat, it’s essential to prepare your vehicle properly. Start by reading both your vehicle’s owner manual and the car seat manual. These manuals contain critical information specific to your car and the car seat model, making the installation easier and more accurate. Ensure your vehicle is parked on flat ground for stability during installation. Identify the safest seating position; typically, the center of the rear seat is the preferred location as it’s the farthest from any impact in a crash.
Clear any clutter and debris from the back seat area to provide a clean and accessible space for the car seat installation. Finally, inspect your car’s seat belts or LATCH (Lower Anchors and Tethers for Children) system and familiarize yourself with their usage as they will be integral in securing the car seat.
Step-by-Step Guide to Installing the Car Seat Base
Now that your vehicle is ready, let’s go through the installation process step-by-step:
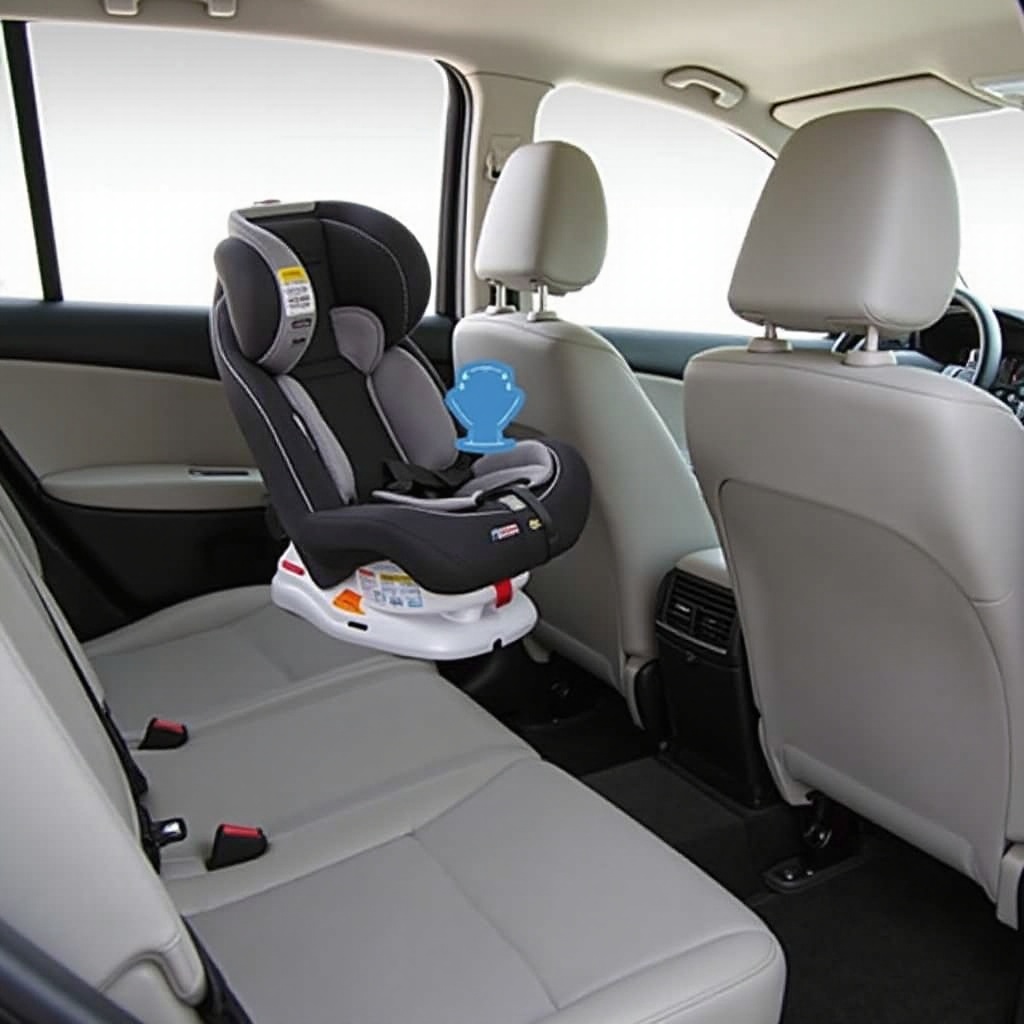
- Position the Base: Start by placing the car seat base in the preferred location, generally the center of the back seat.
- Level the Base: Most car seat bases have a built-in leveling indicator. Ensure it shows the base is level by adjusting the angle adjuster.
- Attach the Base Using LATCH or Seat Belt: If using the LATCH system, connect the lower anchors properly; make sure you hear a click to signify they are locked. If using a seat belt, thread it through the belt path and buckle it securely.
- Tighten the Base: Whether using LATCH or a seat belt, press down firmly on the base and pull the attachment straps or the seat belt to tighten it. There should be no more than an inch of movement side-to-side or front-to-back.
- Check the Installation: Double-check the leveling indicator and ensure the base is tight and secure. If it’s not leveled or moves more than an inch, readjust accordingly.
With the base installed, the next steps involve securing the car seat itself to ensure it is ready for your child.
Securing the Rear-Facing Car Seat
With the base installed securely, the next step is to attach the car seat itself.
- Attach the Car Seat: Place the car seat onto the base. You should hear a click indicating the seat is securely locked into the base.
- Adjust the Harness: Before placing your child in the seat, adjust the harness to fit snugly. Ensure the harness is at or below your child’s shoulders.
- Place Your Child in the Seat: Position your child with their back and bottom against the back of the car seat.
- Buckle the Harness: Buckle the harness and the chest clip. The chest clip should be positioned at armpit level to ensure it does its job effectively.
- Tighten the Harness: Tighten the harness straps until they are snug. You should not be able to pinch any slack on the harness straps at the shoulder.
Properly securing your car seat will ensure that your child is both comfortable and safe during every car trip.
Final Safety Checks
Once the car seat is installed, perform these final safety checks to ensure everything is secure:
- Ensure No Movement: The car seat should not move more than an inch side-to-side or front-to-back at the belt path.
- Check the Harness: Ensure the harness is snug and secure. The straps should lay flat without twists.
- Verify the Angle: The car seat must be reclined at the correct angle. Check the leveling indicator once more.
- Double-Check the Manual: Refer back to the manuals for any missed steps or final advice.
Completing these safety checks can offer peace of mind knowing your child is secure.
Common Mistakes to Avoid
Avoid these common pitfalls when installing a rear-facing car seat:
- Incorrect Angle: Always use the leveling indicator to ensure the seat is correctly reclined.
- Loose Installation: Ensure the base is tightly secured using the LATCH or seat belt with minimal movement.
- Harness Misuse: The harness should be snug with the chest clip at armpit level and straps lying flat.
- Wrong Positioning: The rear-facing seat should be in the rear, ideally in the center for maximum safety.

Conclusion
Proper installation of a rear-facing car seat is crucial for your child’s safety. By following the steps and guidelines outlined in this article, you can ensure your car seat is correctly installed, providing peace of mind and protection for your child during car journeys.
Frequently Asked Questions
What is the best position for a rear-facing car seat?
The safest place for a rear-facing car seat is typically the center of the back seat, away from the airbags and the potential impact in a crash.
How tight should the car seat base be?
The base should be tight enough that it moves less than an inch side-to-side or front-to-back at the belt path.
When should I switch from a rear-facing to a forward-facing car seat?
Switch to a forward-facing car seat when your child reaches the maximum weight or height limit of the rear-facing seat, typically around age two or older.